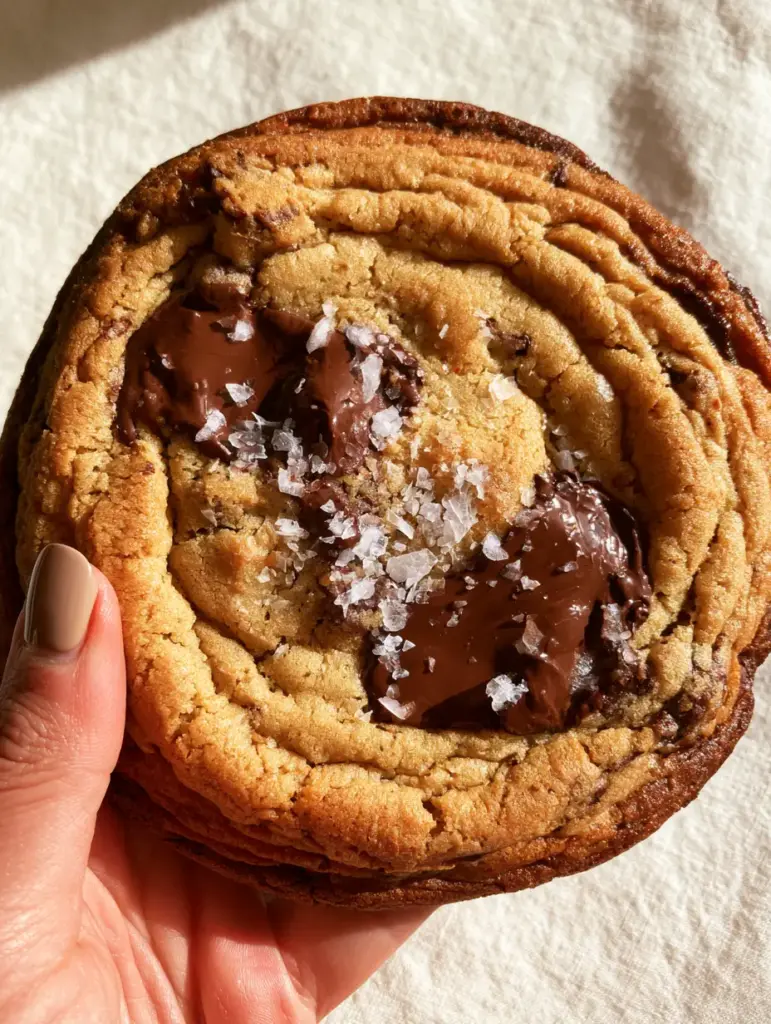
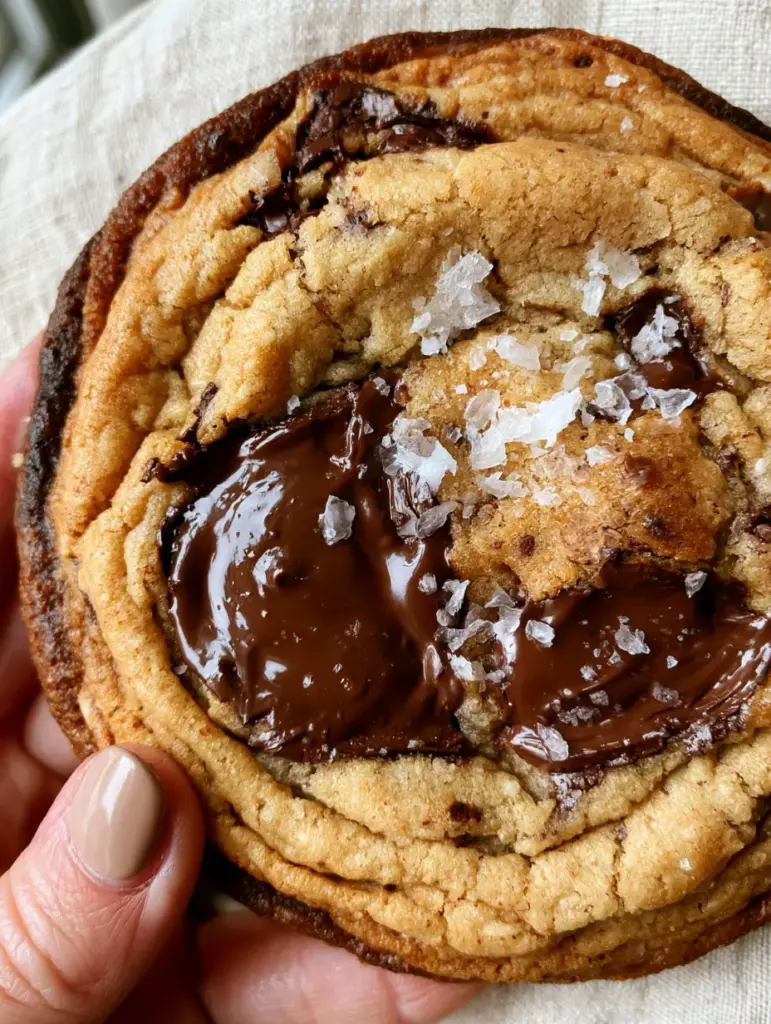
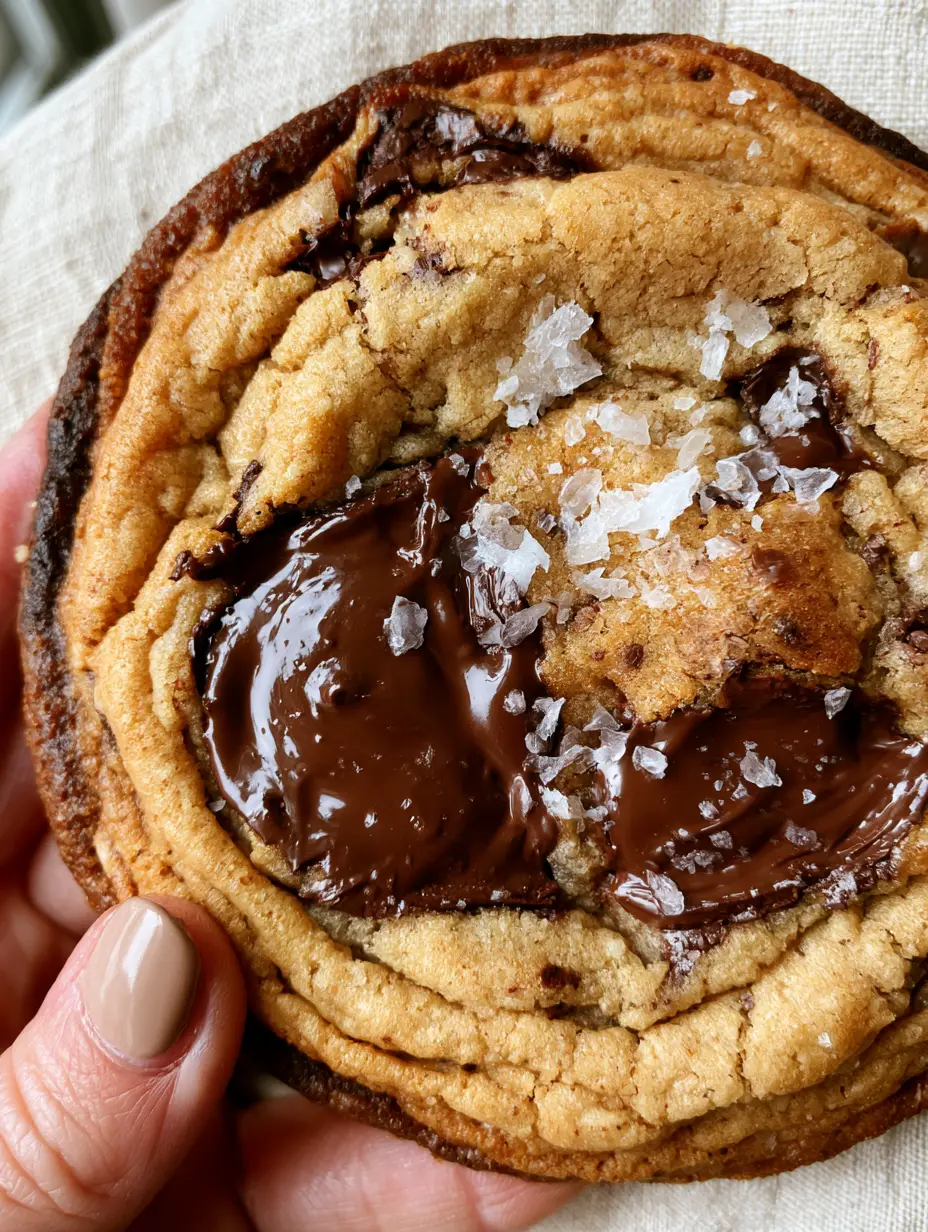
The Rippled Chocolate Chip Cookies are not just a dessert; they are a textural masterpiece that redefined the modern bakery aesthetic. Imagine a cookie so large it barely fits in your hand, featuring deep, concentric dough circles that look like shattered waves of golden-brown sugar and butter. As your teeth sink past the ultra-crispy, dark golden edges, you hit a soft buttery center that feels almost underbaked in its decadence. Nestled within these dramatic crinkles are glossy, molten pools of dark chocolate, perfectly balanced by a generous dusting of large flaky sea salt crystals. This recipe brings that high-end bakery experience directly into your kitchen, utilizing a specialized “pan-banging” technique to achieve those iconic, gravity-defying ripples.
Why You Will Obsess Over These Shattered Wave Cookies
- Dramatic Architectural Ripples: The unique pan-banging method creates deep concentric circles that maximize the surface area for caramelization.
- Multi-Textural Experience: You get the perfect trifecta of ultra-crispy edges, a chewy middle ring, and a soft, molten center.
- Molten Dark Chocolate Pools: By using high-quality chocolate discs rather than standard chips, we create wide, glossy reservoirs of liquid gold.
- The Perfect Salt-Sweet Equilibrium: Large crystals of Maldon sea salt cut through the richness of the butter and dark chocolate for a professional finish.
The Science of the Ripple: Essential Ingredients and Substitutions
To achieve the specific visual blueprint of the Rippled Chocolate Chip Cookies, every ingredient must serve a structural and chemical purpose. We aren’t just making a cookie; we are engineering a series of ripples that require specific fat and sugar ratios to spread and collapse correctly.
Unsalted European-Style Butter: 1 cup (227g) of room temperature butter provides the necessary fat content. Using a high-butterfat European style ensures a richer flavor and better spread for those wide concentric circles. If you love a deeper flavor profile, you might consider how salted butter chocolate chip cookies offer a different savory note, but for this recipe, we control the salt manually.
Granulated White Sugar: 1 ½ cups (300g) of white sugar is crucial for the crispy, dark golden edges. White sugar aerates the butter and helps the cookie spread, which is the foundational movement needed to create ripples.
Light Brown Sugar: ½ cup (100g) adds the necessary moisture and molasses flavor for the soft buttery center. This creates the chewy contrast to the shattered wave exterior.
Large Egg: 1 egg (50g) at room temperature acts as the primary emulsifier and binder. It provides just enough structure to keep the giant dough footprint from falling apart when you pick it up.
Pure Vanilla Extract: 1 tbsp (15ml) offers the aromatic backbone of the dough. It bridges the gap between the caramelized sugar and the intense dark chocolate.
All-Purpose Flour: 2 cups (250g) provides the protein structure. We keep the flour count slightly lower than traditional recipes to encourage the spread and collapse cycle during baking.
Baking Soda: ½ tsp (3g) reacts with the brown sugar to provide lift and contribute to the deep golden-brown browning (the Maillard reaction).
Kosher Salt: ½ tsp (3g) is whisked into the dough to season the flour. This is separate from the finishing salt and is vital for flavor depth.
Dark Chocolate Discs (60% Cacao or higher): 8 oz (225g) of high-quality chocolate discs or a chopped bar. Unlike chips, which contain stabilizers to hold their shape, discs melt into the wide molten pools seen in our visual blueprint.
Flaky Sea Salt: 1 tbsp (10g) for finishing. These large crystals provide the visual “sparkle” and a targeted burst of saltiness that enhances the dark chocolate.
Culinary Tools for Perfect Concentric Crinkles
Achieving the Rippled Chocolate Chip Cookies look requires more than just a bowl and spoon; you need tools that can withstand the “banging” process. A heavy-duty, light-colored aluminum baking sheet is non-negotiable for even heat distribution.
You will also need high-quality parchment paper or a silicone baking mat to ensure the giant cookies don’t stick as they expand. A large 3-ounce (85g) cookie scoop is necessary to ensure every cookie is a “giant bakery-style” portion, providing enough mass to create multiple ripple rings. Finally, a wire cooling rack is essential to stop the cooking process immediately and preserve the crispness of those dark golden edges.
Master the Ripple: A Step-by-Step Guide to Pan-Banging
Phase 1: Creaming for Structure
In the bowl of a stand mixer fitted with the paddle attachment, combine your room temperature butter, granulated sugar, and brown sugar. Beat on medium-high speed for approximately 3-5 minutes until the mixture is pale, light, and fluffy. You are looking for a texture that resembles whipped frosting; this aeration is what allows the dough to rise and then fall during the banging stages.
Phase 2: Emulsifying the Wet Ingredients
Add the egg and vanilla extract to the creamed mixture. Beat for another minute, scraping down the sides of the bowl to ensure full incorporation. The mixture should look glossy and cohesive. If it looks curdled, continue beating for 30 seconds until it smooths out.
Phase 3: The Gentle Fold
In a separate bowl, whisk together the flour, baking soda, and kosher salt. Turn the mixer to the lowest setting and slowly add the dry ingredients. Mix until just combined—stop as soon as you see no more white streaks of flour. Over-mixing at this stage will develop too much gluten, leading to a tough cookie rather than the shattered wave texture we desire. Gently fold in the dark chocolate discs by hand, ensuring they are evenly distributed.
Phase 4: The Giant Scoop and Chill
Using your 3-ounce (85g) scoop, portion the dough into large mounds onto a parchment-lined tray. For the best Rippled Chocolate Chip Cookies, chill the dough balls in the refrigerator for at least 15 minutes. This firms up the fat, ensuring the center stays soft while the edges begin to crisp and ripple.
Phase 5: The Banging Technique
Preheat your oven to 350°F (175°C). Place only 3 or 4 dough balls on a large baking sheet, as these cookies will spread significantly. Bake for 10 minutes until the cookies are beginning to puff up in the center. Open the oven door, lift the side of the baking sheet about 4 inches (10cm), and let it drop straight down onto the oven rack. You will hear a loud “thud,” and you will see the puffed-up center collapse, pushing the dough toward the edges and creating the first ripple.
Phase 6: Creating the Concentric Circles
Repeat this banging process every 2 minutes for the remainder of the bake time (usually another 6-8 minutes). Each bang creates a new concentric circle. The cookies are finished when the edges are dark golden-brown and ultra-crispy, but the very center still looks slightly pale and underbaked. Remove from the oven and immediately sprinkle with the large flaky sea salt crystals while the chocolate pools are still molten.
Sensory Cues: How to Spot a Perfectly Underbaked Center
Knowing when to pull your Rippled Chocolate Chip Cookies out of the oven is a sensory skill. You should smell the deep, toffee-like aroma of caramelized sugar and toasted butter. Visually, look for the “shattered wave” effect—the ripples should be distinct and darker than the valleys between them. The molten pools of chocolate will look glossy and wet. If the center looks completely dry and firm, you have overbaked them; it should still look slightly “lush” and soft to the touch, as it will firm up into a buttery fudge texture while cooling.
Expert Tips for Golden, Ultra-Crispy Edges
- Use Room Temperature Ingredients: Ensure your egg and butter are not cold. This creates a stable emulsion that prevents the fat from leaking out too quickly during the first stage of baking.
- Don’t Crowd the Pan: Because these are giant bakery-style cookies, they need space to expand. Crowding the pan will lead to the ripples merging into each other, ruining the aesthetic.
- The “Thud” Matters: Don’t be afraid to bang the pan firmly. The force is what creates the “shattered” look of the dough.
- Quality of Chocolate: If you use standard chips, you won’t get those wide melted pools. Opt for discs or a hand-chopped 70% dark chocolate bar for the best visual and flavor results. For a different take on chocolate textures, you might enjoy salted brownie crinkle cookies.
Long-Term Storage and Dough Freezing Tips
To maintain the ultra-crispy edges, store these Rippled Chocolate Chip Cookies in an airtight container at room temperature for up to 3 days. If you find the edges have softened, you can crisp them up in a 300°F (150°C) oven for 2-3 minutes. For long-term storage, you can freeze the portioned dough balls for up to 3 months. When baking from frozen, add an extra 2-3 minutes to the initial bake time before you start the banging process.
Perfectly Paired Indulgences
These cookies are a decadent treat on their own, but they also pair beautifully with other gourmet flavors. For a sophisticated dessert party, serve these cookies alongside a Baileys chocolate martini. The creamy liqueur complements the dark chocolate pools perfectly. If you are looking for more cookie inspiration that plays with texture, check out our inside out chocolate chip cookies or the classic chewy texture of copycat Subway cookies. For those who prefer a healthy start before their cookie indulgence, a glass of glow boosting juice is a great way to balance the day.
Frequently Asked Questions
While you can, chocolate chips contain stabilizers that help them keep their shape. To achieve the ‘molten pools’ seen in the visual blueprint, high-quality chocolate discs or chopped bars are highly recommended.
The key is to pull them out when the center still looks slightly underbaked and ‘wet.’ The residual heat on the baking sheet will finish cooking the middle to a soft, buttery texture.
This usually happens if the dough is too dry or the oven temperature is too low. Ensure you measure your flour accurately using the spoon-and-level method and that your oven is fully preheated to 350°F (175°C).
Banging the pan causes the puffed-up center of the cookie to collapse, pushing the dough outward and creating the distinct concentric ripples and ultra-crispy edges characteristic of this style.
The size provides enough mass to allow for the cycle of rising and falling multiple times. Smaller cookies will cook through before you can achieve more than one or two ripples.
The Official Rippled Chocolate Chip Cookies Recipe Card
Rippled Chocolate Chip Cookies: The Ultimate Bakery-Style Pan-Banging Recipe
Ingredients
Equipment
Method
- Cream the 1 cup (227g) butter with 1.5 cups (300g) white sugar and 0.5 cups (100g) brown sugar for 3-5 minutes until fluffy.
- Mix in the 1 egg (50g) and 1 tbsp (15ml) vanilla extract until smooth and glossy.
- Whisk 2 cups (250g) flour, 0.5 tsp (3g) baking soda, and 0.5 tsp (3g) kosher salt, then fold into wet ingredients. Fold in 8 oz (225g) dark chocolate discs.
- Use a 3-oz scoop to make large dough balls. Chill on a tray for 15 minutes.
- Bake at 350°F (175°C) for 10 minutes until puffed in the center.
- Lift the pan 4 inches and drop it to collapse the dough. Repeat every 2 minutes until edges are dark golden and ripples have formed. Finish with 1 tbsp (10g) flaky sea salt.
Notes
Ensure the butter is truly room temperature for the best spread and ripple formation.
Share Your Shattered Wave Masterpiece!
We hope you love the theatrical process and the incredible flavor of these Rippled Chocolate Chip Cookies. The combination of the crispy, shattered waves and the molten dark chocolate pools makes this a recipe you will return to time and time again. If you make these, please leave a comment below and let us know how your ripples turned out! Don’t forget to take a photo of your giant bakery-style creation and share it with us on Pinterest so we can see your beautiful results.