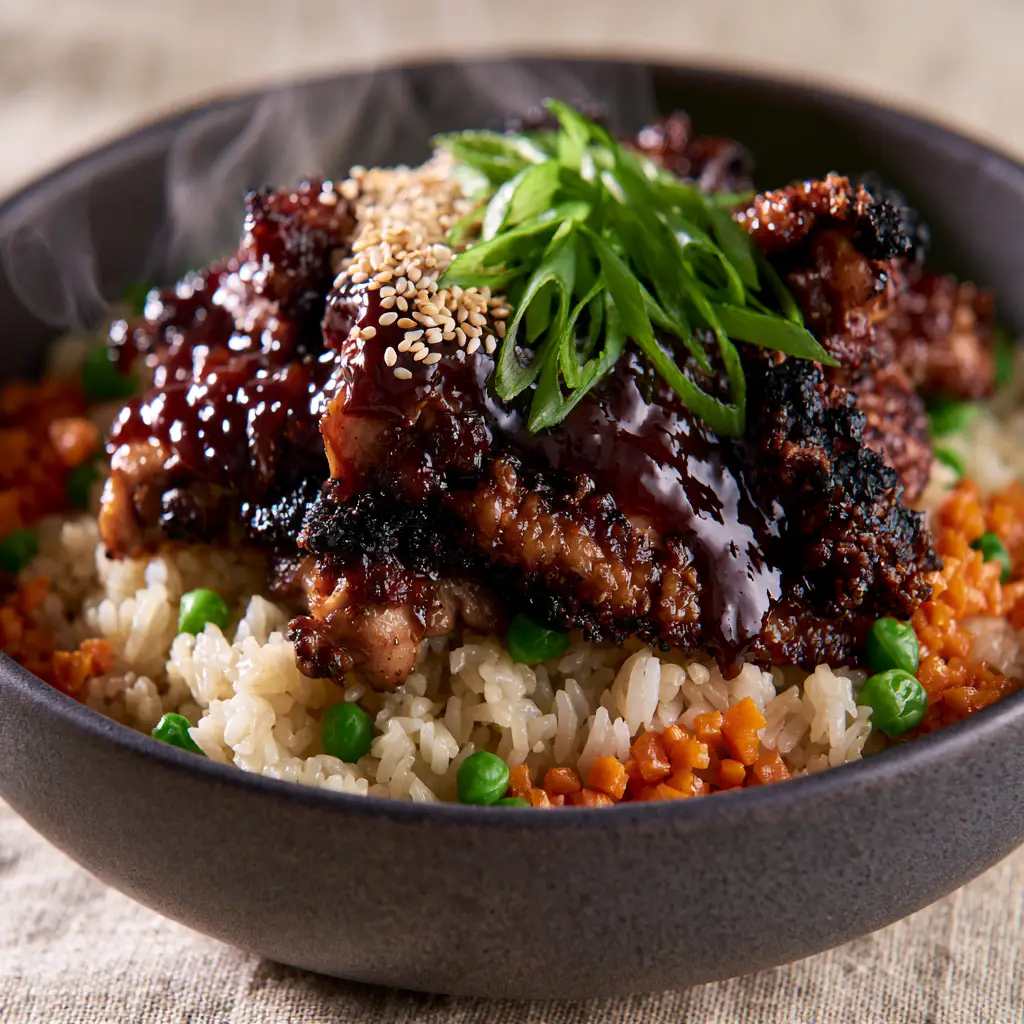
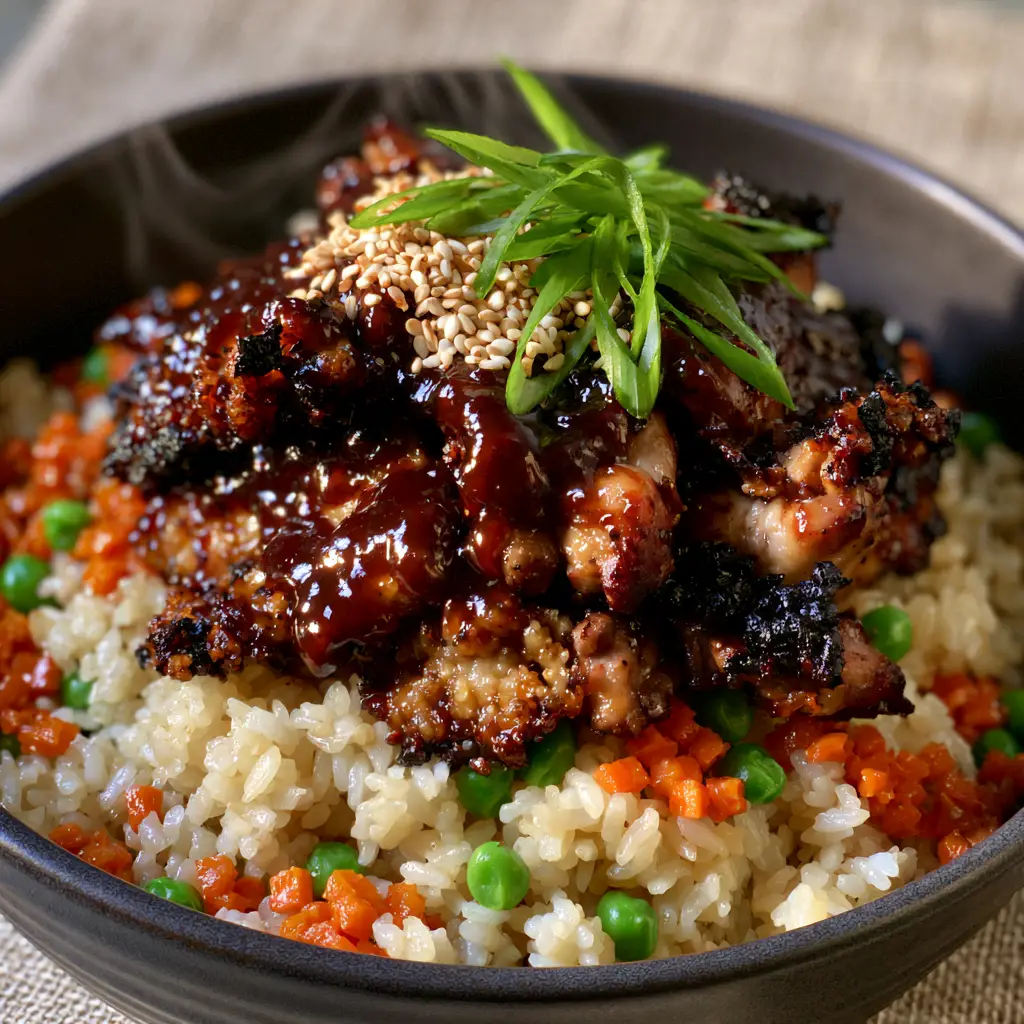
There is a specific sensory magic that occurs when a high-heat wok meets the sweet, umami-rich depths of Japanese barbecue sauce. This Japanese BBQ Chicken Fried Rice is the culinary embodiment of that magic, designed to replicate the high-end experience of a Tokyo teppanyaki house right in your own kitchen. Served in a matte charcoal ceramic bowl, the visual contrast of vibrant vegetables against mahogany-glazed chicken is nothing short of breathtaking.
Imagine soft wisps of steam rising from a bed of perfectly distinct, fluffy jasmine rice grains. Each morsel of chicken thigh is seared to perfection, boasting crispy charred edges that yield to a tender, juicy interior. The entire dish is brought together by a thick, glossy Yakiniku glaze that clings to every ingredient, punctuated by the crunch of toasted sesame seeds and the bite of fresh scallions.
Whether you are looking for a weeknight upgrade or a weekend showstopper, this recipe delivers restaurant-quality results. We have meticulously balanced the sugars in the Japanese BBQ sauce with the savory notes of seared poultry to ensure every bite is a complex symphony of flavors. Let’s dive into the forensics of why this specific preparation stands head and shoulders above your standard takeout.
Why You Will Crave This Yakiniku-Style Fried Rice
- The Maillard Masterclass: By using high-fat chicken thighs, we achieve a superior sear and “crispy charred edges” that chicken breast simply cannot replicate.
- Texture Contrast: The “fluffy jasmine rice grains” remain individually distinct and toothsome, avoiding the mushy texture common in amateur fried rice.
- Visual Sophistication: The “thick mahogany yakiniku glaze” provides a deep, professional-grade sheen that looks stunning against the matte charcoal bowl.
- Balanced Aromatics: A precise blend of toasted white sesame seeds and thin-sliced fresh scallions provides a layered finishing note.
The Anatomy of Ingredients for Japanese BBQ Chicken Fried Rice
To achieve the “realistic textures” and vibrant colors shown in our visual blueprint, every ingredient must serve a specific structural and flavor-based purpose. We aren’t just tossing things in a pan; we are building a flavor profile layer by layer.
The Protein: Seared Chicken Thigh Chunks
You will need 1.5 lbs (680g) of boneless, skinless chicken thighs, cut into 1-inch (2.5cm) morsels. Thigh meat contains more connective tissue and fat than breast, which allows it to withstand the high heat required for those “crispy charred edges” without drying out.
The Base: Fluffy Jasmine Rice Grains
We use 4 cups (600g) of cooked jasmine rice, preferably chilled overnight. Cold rice is essential for achieving “individually distinct” grains; the refrigeration process dehydrates the surface starch, preventing the rice from clumping together when it hits the hot oil.
The Glaze: Thick Mahogany Yakiniku Sauce
Use 3/4 cup (180ml) of high-quality Japanese BBQ sauce (Yakiniku sauce). This sauce typically contains soy sauce, mirin, sugar, and toasted sesame oil, providing that signature “thick, glossy, dark mahogany” finish that defines this dish.
The Garden: Vibrant Carrots and Sweet Peas
You’ll need 1/2 cup (75g) of finely diced carrots and 1/2 cup (75g) of bright green sweet peas. The carrots provide a subtle sweetness and crunch, while the peas offer a pop of color and a soft, starchy texture that balances the savory chicken.
Foundational “Invisible” Ingredients
Do not forget 2 tbsp (30ml) of neutral high-smoke-point oil (like avocado or grapeseed oil) for the sear. Additionally, 1 tsp (5g) of kosher salt and 1/2 tsp (2g) of cracked black pepper are necessary to season the chicken before the glaze is applied.
Essential Equipment for High-Heat Searing
To recreate the “macro food photography” look of this recipe, you need the right tools to handle high-temperature cooking. A heavy-bottomed carbon steel wok or a large cast-iron skillet is non-negotiable for achieving the proper sear on the chicken.
A wide, flat spatula is also necessary to toss the rice without breaking the delicate jasmine grains. Finally, serving this in a matte charcoal ceramic bowl—as seen in our visual blueprint—provides the neutral, high-end backdrop that makes the mahogany glaze and green scallions truly pop.
Mastering the Sear: Step-by-Step Instructions
Phase 1: Preparing the Chicken for the Glaze
Pat your chicken thigh chunks bone-dry with paper towels to ensure a maximum sear. Season them lightly with salt and pepper, keeping in mind that the Yakiniku sauce is naturally salty. Heat your oil in the wok until a light wisp of smoke appears.
Add the chicken in a single layer, leaving space between chunks to prevent steaming. Let them sit undisturbed for 3-4 minutes until a deep golden-brown crust forms. Flip and cook for another 2 minutes until you see those “crispy charred edges” forming.
Phase 2: Developing the Mahogany Coating
Once the chicken is nearly cooked through, pour half of the Yakiniku glaze over the meat. Toss rapidly over high heat; the sugars in the sauce will begin to caramelize almost instantly. Look for the sauce to thicken into a “thick, glossy, dark mahogany” coating that clings tightly to each piece of meat.
Phase 3: Sautéing the Vegetables and Rice
Remove the chicken from the pan and add another teaspoon of oil if needed. Toss in your finely diced carrots, stir-frying for 2 minutes until they are slightly softened but still vibrant. Add the bright green sweet peas and the cold jasmine rice.
Break up any rice clumps with your spatula and toss constantly for 3-5 minutes. You are looking for a sensory cue: the rice should begin to “dance” or jump in the pan, indicating that the moisture has evaporated and the grains are being toasted. Pour in the remaining Yakiniku glaze and toss until the rice is evenly tinted.
Phase 4: The Final Assembly
Return the glazed chicken to the wok and give it one final, vigorous toss to marry the flavors. Transfer the mixture into your matte charcoal ceramic bowl, piling it high to create that professional “bed of fluffy jasmine rice grains” aesthetic. The steam should be rising in soft wisps as you move to the garnish.
Expert Tips for Visual and Culinary Perfection
- Rinse Your Rice: Always rinse your jasmine rice under cold water until it runs clear before cooking. This removes excess surface starch, ensuring the grains stay “individually distinct.”
- The Temperature Spike: If your pan drops in temperature, the chicken will boil in its own juices rather than searing. Work in batches if your stove lacks high-BTU power.
- Garnish Timing: Wait until the very last second to add the “thin-sliced fresh scallions.” The residual heat from the rice will soften them slightly, but they should remain “bright green” for maximum visual impact.
- Texture Balance: If you find your glaze is too thin, simmer it separately with a small cornstarch slurry before adding it to the chicken. This ensures that “thick, glossy” look.
How to Store and Reheat Your Fried Rice
Japanese BBQ Chicken Fried Rice stores exceptionally well, making it a premier candidate for meal prep. Keep leftovers in an airtight container in the refrigerator for up to 3 days. The flavors of the Yakiniku sauce will actually deepen and permeate the rice grains further over time.
To reheat, avoid the microwave if possible, as it can make the rice rubbery. Instead, return the rice to a hot skillet with a splash of water or extra Yakiniku sauce. Cover for 1 minute to let the steam revive the jasmine grains, then toss until the chicken edges are once again slightly crisp.
What to Serve with This Japanese BBQ Masterpiece
This dish is a complete meal on its own, but it pairs beautifully with other Asian-inspired textures. For a lighter side, try a crisp cucumber salad or some candied fruit for a unique dessert contrast. If you are hosting a larger spread, these savory steak kabobs share a similar charred profile that complements the Yakiniku flavors.
For those who love the classic version of this meal, you might also enjoy comparing this to our classic chicken fried rice or the more aromatic Thai fried pork rice. If you have leftover chicken, it works perfectly in a one-pan balsamic chicken prep for the following day.
Frequently Asked Questions
Yes, but chicken thighs are preferred for their higher fat content, which allows for better searing and crispy charred edges without drying out the meat.
Ensure the rice is cold and dry before adding it to the pan, and use high heat to sear the grains quickly rather than steaming them.
A large cast-iron skillet is a great alternative. It retains heat exceptionally well, which is crucial for achieving the Maillard reaction on the chicken and rice.
Jasmine rice is ideal because it remains fluffy and distinct. For the best texture, use rice that was cooked the day before and refrigerated to reduce moisture.
Most Asian grocery stores carry Yakiniku sauce (Japanese BBQ sauce). Look for brands like Bachan’s or Ebara for the most authentic mahogany glaze finish.
The Ultimate Japanese BBQ Chicken Fried Rice Recipe
Japanese BBQ Chicken Fried Rice with Glossy Mahogany Yakiniku Glaze
Ingredients
Equipment
Method
- Heat oil in a wok over high heat. Add seasoned chicken chunks in a single layer. Sear for 3-4 minutes without moving until crispy charred edges form.
- Add half of the Yakiniku sauce to the pan. Toss rapidly for 1-2 minutes until the chicken is coated in a thick mahogany glaze. Remove chicken from pan and set aside.
- Add carrots and peas to the pan. Stir-fry for 2 minutes. Add the cold jasmine rice, breaking up clumps with a spatula.
- Pour the remaining Yakiniku sauce over the rice. Toss over high heat for 3-5 minutes until the rice grains are individually distinct and tinted mahogany.
- Return chicken to the pan and toss to combine. Serve in a charcoal bowl and garnish with toasted sesame seeds and fresh scallions.
Notes
Ensure the pan is screaming hot before adding the chicken to get those charred edges.
Bring the Hibachi Experience Home
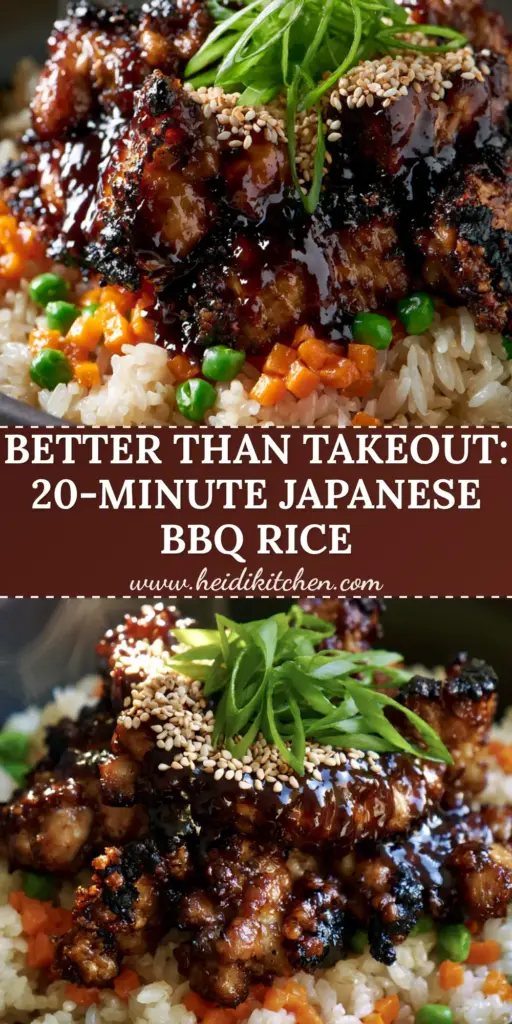
This Japanese BBQ Chicken Fried Rice is more than just a meal; it is a celebration of texture and bold, umami-forward flavors. From the “glossy dark mahogany” glaze to the “bright green sweet peas,” every element is designed to delight both the eyes and the palate. We hope this becomes a staple in your home rotation!
If you enjoyed this recipe, please leave a comment below and let us know how your sear turned out! Don’t forget to save this recipe to your favorite boards on Pinterest so you can find it whenever the craving for Japanese BBQ strikes.