The chicken milanese is the undisputed gold standard of crispy poultry. When you bite into a piece that has been prepared with forensic precision, you experience a “shatteringly crisp” crust that gives way to succulent, tender meat. This isn’t just a fried chicken cutlet; it is a masterclass in texture, balanced by a bright, peppery arugula salad and a decadent, glossy lemon garlic butter glaze.
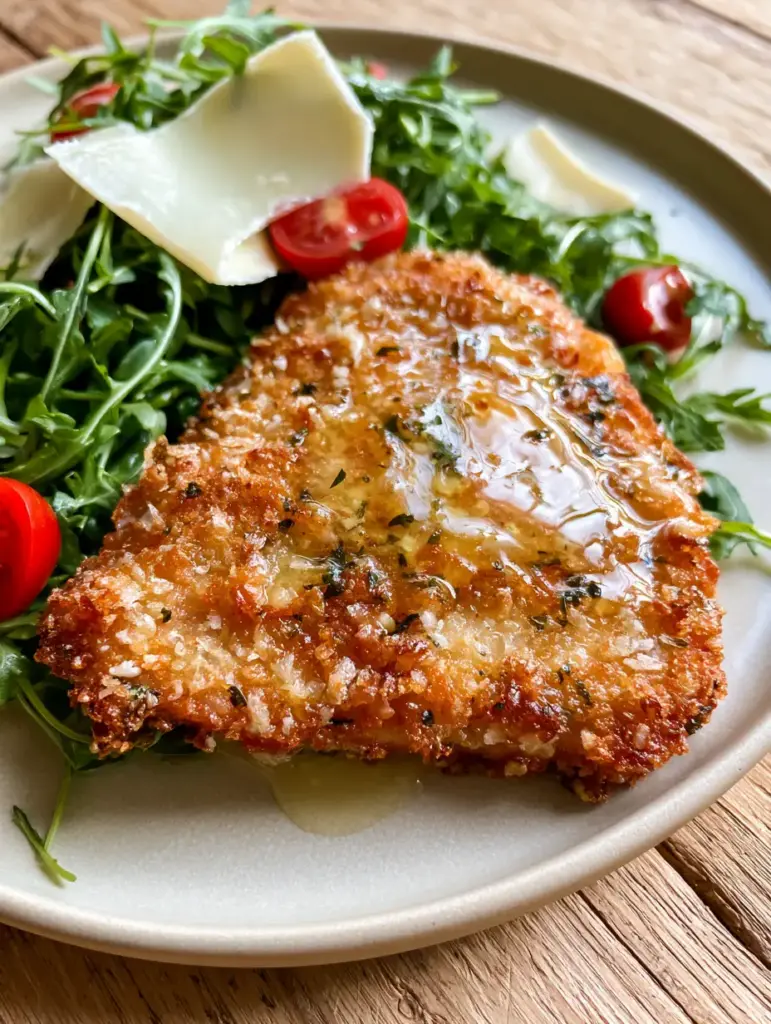
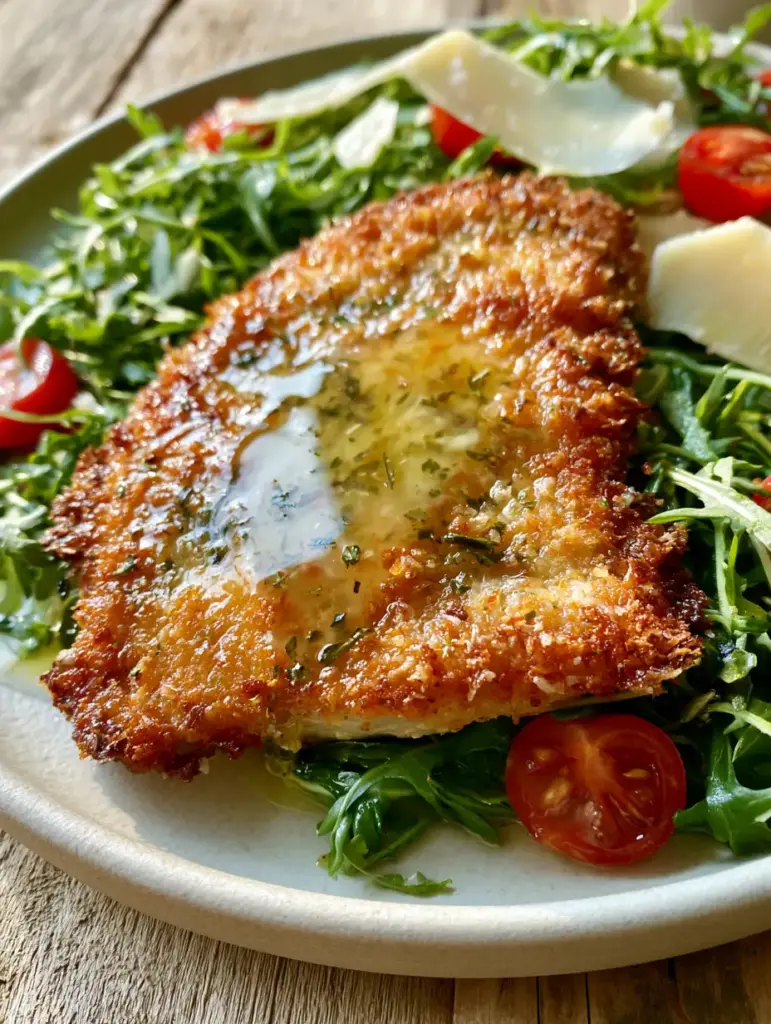
In this guide, we are recreating the exact visual masterpiece found in high-end bistro photography. Imagine a thick, textured mosaic of panko crumbs and grated parmesan, catching the morning light on a rustic wooden table. Every element, from the translucent parmesan shavings to the burst of halved cherry tomatoes, serves a specific culinary and aesthetic purpose in this authentic Italian recipes inspired dish.
The Secret to a Mosaic Crust: Why This Recipe Works
Most home cooks struggle with soggy breading or uneven browning. This version of chicken milanese solves those issues through specific structural choices. By using panko instead of traditional breadcrumbs, we create more surface area for the oil to crisp, resulting in that sought-after “mosaic” appearance.
- Shatteringly Crisp Texture: The combination of Panko and finely grated parmesan creates a multifaceted crust that stays crunchy even under the lemon garlic butter glaze.
- The “Glossy” Glaze: Unlike a heavy gravy, our lemon garlic butter is translucent and bright, adding fat and acidity without weighing down the breading.
- Aromatic Depth: Finely flecked dried herbs and cracked black pepper are suspended within the crust, releasing oils the moment they hit the hot pan.
- Balanced Freshness: The vibrant mound of peppery arugula and acidic cherry tomatoes cuts through the richness of the fried chicken.
The Essential Components for a Shatteringly Crisp Crust
To achieve the visual and textural results seen in professional culinary photography, every ingredient must be measured with precision. We are building layers of flavor from the meat itself to the final garnish of chopped parsley.
The Protein Base: 1.5 lbs (680g) Boneless Skinless Chicken Breasts. Using high-quality breast meat is essential; we will pound these until thin to ensure the cook time is fast enough to keep the meat juicy while the crust turns golden-brown.
The Dredging Foundation: 0.5 cup (60g) All-Purpose Flour seasoned with 1 tsp (5g) Kosher Salt. This initial coating absorbs surface moisture, acting as the “glue” that prevents the breading from slipping off the meat during frying.
The Binding Agent: 2 Large Eggs (100g) beaten with 1 tbsp (15ml) water. The water thins the proteins in the egg, creating a lighter coating that won’t become “cakey” or thick between the chicken and the crumbs.
The Mosaic Breadcrumb Mix: 1.5 cups (90g) Panko Breadcrumbs mixed with 0.5 cup (45g) finely grated Parmesan cheese. Panko provides the height and crunch, while the parmesan melts into the crevices to create a savory, browned lattice.
The Herbed Aromatics: 1 tsp (2g) Dried Oregano and 1 tsp (2g) Dried Thyme. These dried herbs are more heat-stable than fresh ones, allowing them to toast in the oil without burning or becoming bitter.
The Searing Fat: 0.5 cup (120ml) Neutral Oil (such as Avocado or Grapeseed oil). A high smoke point oil is non-negotiable for achieving that deep golden-brown color without the acrid taste of burnt fat.
The Glossy Glaze: 4 tbsp (56g) Unsalted Butter, 2 cloves Garlic (minced), and 2 tbsp (30ml) Fresh Lemon Juice. This creates the translucent, catching-the-light finish that makes the dish look as good as it tastes.
The Vibrant Salad Topping: 3 cups (60g) Fresh Arugula, 1 cup (150g) Cherry Tomatoes (halved), and 2 oz (56g) Shaved Parmesan. These components add the “airy mound” visual and provide the necessary peppery bite to balance the fried cutlet.
The Final Flourish: 2 tbsp (8g) Finely Chopped Fresh Parsley, 1 tsp (2g) Cracked Black Pepper, and Lemon Wedges. These additions are the “bridge” ingredients that tie the earthy chicken to the bright salad.
Necessary Tools for Professional Results
Achieving a chicken milanese that looks like a handheld smartphone photo from a rustic cafe requires more than just a pan. You need tools that manage heat and thickness effectively.
First, a heavy-bottomed stainless steel or cast-iron skillet is required. These materials hold heat consistently, preventing the oil temperature from dropping when the chicken is added. You will also need a meat mallet or a heavy rolling pin to pound the chicken to a uniform 1/4-inch (0.6cm) thickness. Uniformity is the secret to a cutlet that is fully cooked at the exact moment the crust reaches peak crispness.
Finally, a wire cooling rack is essential. Never place fried chicken directly onto a plate or paper towels, as the trapped steam will immediately soften the bottom crust. A wire rack allows air to circulate, maintaining that mosaic texture on both sides of the cutlet.
Mastering the Art of the Golden-Brown Pan-Sear
Technique: The Perfect Uniform Pound
Start by slicing your chicken breasts in half horizontally (butterflying) to create thinner pieces. Place the chicken between two sheets of plastic wrap or in a heavy-duty freezer bag. Using the flat side of a meat mallet, gently but firmly pound the chicken from the center outward.
Your goal is a uniform 1/4-inch (0.6cm) thickness. This isn’t just about cooking speed; a flat surface ensures the entire cutlet makes contact with the hot oil, leading to an even, edge-to-edge golden-brown finish. If you enjoy this preparation style, you might also like our chicken taquitos for another crispy poultry option.
Establishing the Breadment Station
Organize three shallow bowls in a row. Bowl one: Flour, salt, and pepper. Bowl two: Beaten eggs and water. Bowl three: The “Mosaic Mix” of panko, grated parmesan, dried oregano, and thyme. This assembly line approach prevents messy “club hands” and ensures each cutlet is perfectly coated.
Press the chicken firmly into the panko mixture. You aren’t just dusting it; you are embedding the crumbs into the egg wash to create that thick, textured mosaic. For those following specific dietary paths, you can explore paleo dairy-free recipes for alternative coating ideas.
Achieving the Shatteringly Crisp Sear
Heat the oil in your skillet over medium-high heat until it shimmers. If you drop a single panko crumb in, it should sizzle immediately. Carefully lay the chicken away from you into the pan to avoid splashes. Cook for 3-4 minutes per side.
Do not crowd the pan. Fry in batches if necessary. Look for a deep golden-brown color and a rigid texture when you lift the edge with tongs. The sound should be a distinct “scrape” against the pan, indicating the panko has fully dehydrated and crisped.
Crafting the Glossy Lemon Garlic Butter Glaze
While the chicken rests on the wire rack, wipe out your skillet (or use a small clean pan). Melt the butter over medium heat until it begins to foam. Add the minced garlic and cook for just 30 seconds until fragrant—do not let it brown.
Remove from heat and whisk in the lemon juice. The sauce should be glossy and translucent. This glaze will be drizzled over the center of the chicken, catching the light and adding a burst of citrus that defines the chicken milanese experience.
Assembling the Airy Arugula Salad
In a large bowl, toss the fresh arugula and halved cherry tomatoes with a tiny drizzle of olive oil and a pinch of salt. Place a large, airy mound of this salad directly on top of the crispy chicken cutlet. Use a vegetable peeler to create those large, thin shavings of salty parmesan cheese, letting them fall naturally over the greens.
Finish the plate with a generous sprinkle of finely chopped parsley and cracked black pepper. The contrast between the matte ceramic plate and the vibrant red tomatoes and green leaves creates a stunning visual presentation often found in lunch or dinner high-end menus.
Expert Tips for Success
- Temperature Control: If the oil is too cold, the breading absorbs the fat and becomes greasy. If it’s too hot, the panko burns before the chicken is cooked. Aim for approximately 350°F (175°C).
- The Double-Press: When coating in panko, use your palm to literally crush the crumbs into the meat. This ensures the “mosaic” doesn’t flake off in the pan.
- Resting is Vital: Let the chicken rest for 2 minutes on a wire rack before plating. This allows the internal juices to redistribute and the crust to fully set.
- Freshness Matters: Use a microplane for the parmesan in the breading but a peeler for the topping. The two different textures of cheese change the way the salt hits your palate.
Storage, Reheating, and Freezing
This chicken milanese is best served immediately to enjoy the contrast between the hot, crispy chicken and the cold, fresh salad. However, if you have leftovers, store the chicken separately from the salad in an airtight container for up to 3 days.
To reheat, avoid the microwave at all costs—it will turn the mosaic crust into a soggy mess. Instead, place the cutlets on a baking sheet in a 375°F (190°C) oven for 8-10 minutes until the oil in the crust begins to sizzle again. You can also use an air fryer at 350°F (175°C) for 3-5 minutes for near-perfect restoration of the original crunch.
What to Serve With This Dish
While the arugula salad is the traditional pairing, you can expand this into a larger meal. If you want a heartier pasta side, this chicken pairs beautifully alongside a creamy tomato spinach pasta or even a simple Gigi Hadid creamy pasta.
For a lighter, vegetable-forward meal, serve it next to creamy pasta with asparagus. The acidity of the lemon garlic butter on the chicken acts as a perfect foil to the rich, earthy notes of green vegetables.
Frequently Asked Questions
While you can, regular breadcrumbs will produce a denser, less ‘shatteringly crisp’ texture. Panko is essential for the airy, mosaic appearance described in this recipe.
Place the cooked cutlets on a wire rack set over a baking sheet in a 200°F (95°C) oven. The wire rack allows air to circulate, preventing steam from making the bottom soggy.
Traditional Milanese uses breast meat pounded thin. It cooks quickly and provides a flat, even surface for the best crust-to-meat ratio. Thighs are tastier but harder to pound into a uniform shape.
This usually happens if the chicken surface was too wet before dredging or if the oil wasn’t hot enough. Ensure you pat the chicken dry and press the panko firmly into the egg wash to create a secure bond.
The Ultimate Chicken Milanese Recipe Card
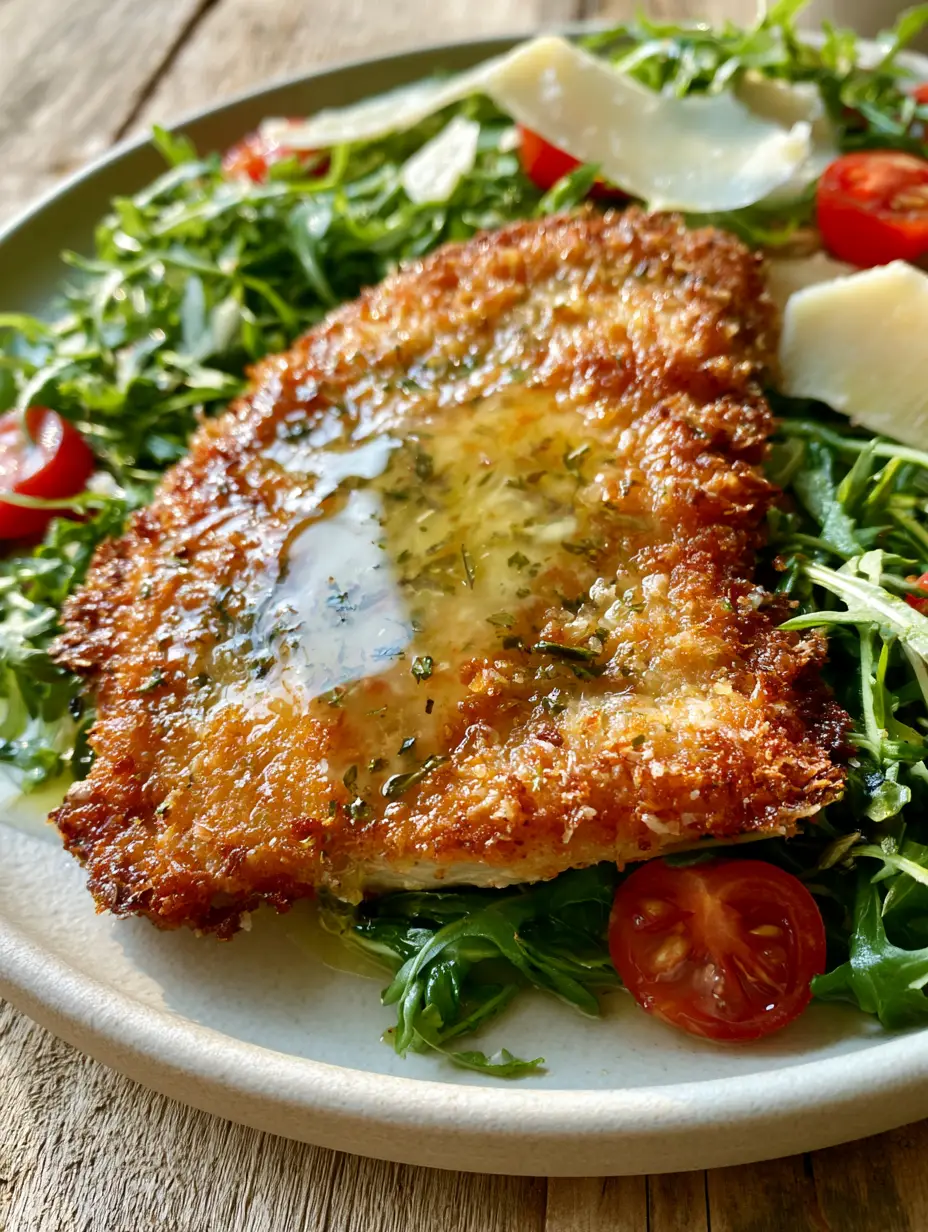
Chicken Milanese with Lemon Garlic Butter and Arugula Salad
Ingredients
Equipment
Method
- Place chicken between plastic wrap and pound to a uniform 1/4-inch (0.6cm) thickness using a meat mallet.
- Prepare three bowls: flour with salt/pepper, beaten eggs, and a panko/parmesan/herb mixture.
- Dredge each cutlet in flour, dip in egg, then press firmly into the panko mixture to create a thick mosaic crust.
- Fry in 0.5 cup (120ml) oil over medium-high heat for 3-4 minutes per side until deep golden-brown and crispy.
- Melt butter in a small pan, sauté garlic for 30 seconds, and whisk in lemon juice until glossy and translucent.
Notes
Ensure the oil is hot (350°F/175°C) before adding the chicken to prevent greasiness.
Closing and Call to Action
Mastering the chicken milanese is a rite of passage for any home cook looking to elevate their weeknight dinner game. The combination of the shatteringly crisp mosaic breading and the glossy, translucent lemon garlic butter creates a sensory experience that is truly unmatched. Whether you are serving this on a matte ceramic plate for a formal dinner or a rustic wooden table for a family meal, it is guaranteed to impress.
If you enjoyed this recipe, please leave a comment below and let us know how your crust turned out! Don’t forget to share your photos and follow us on Pinterest for more culinary inspiration and visual recipe blueprints. Happy cooking!