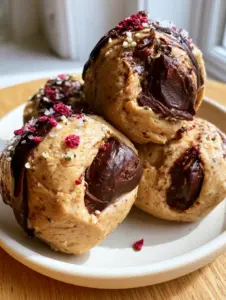
When you are hunting for the ultimate gluten-free snack recipes, you aren’t just looking for something edible; you are looking for a sensory experience that rivals any gourmet confection. These no-bake almond butter and dark chocolate oat bites are designed to be the crown jewel of your meal prep routine. Every bite delivers a symphony of textures, from the hearty chew of thick rolled oats to the snap of oversized dark chocolate chunks, all bound together by the silky, moist sheen of premium almond butter.
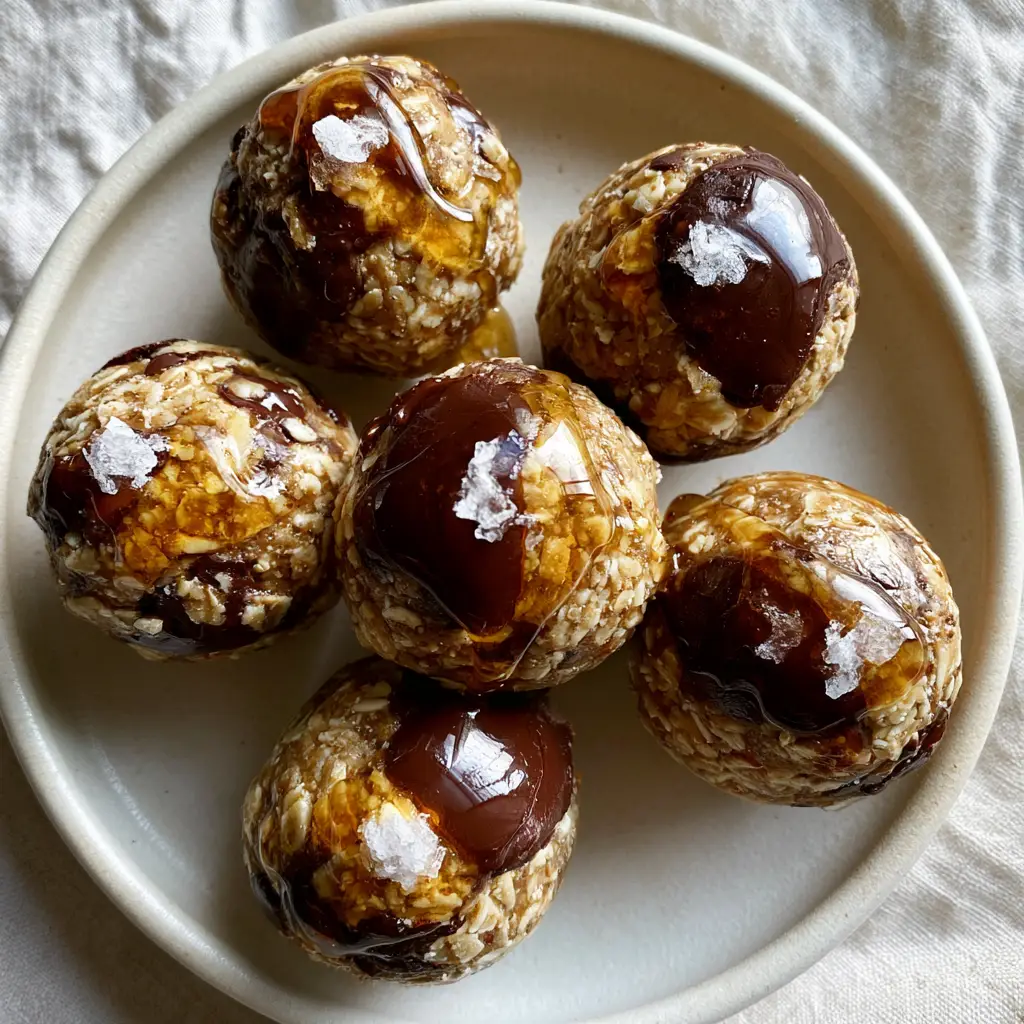
Imagine a top-down view of these round energy bites, arranged organically on a matte ceramic plate, where a golden amber honey drizzle catches the light just before you take a bite. The finish is a deliberate sprinkle of flaky sea salt crystals, providing that crucial savory counterpoint to the deep cocoa and floral honey notes. This is more than a quick fix; it is a scientifically balanced, high-protein treat that satisfies the most intense cravings without ever touching an oven.
The Sensory Architecture of These High-Protein Energy Bites
The success of gluten-free snack recipes depends entirely on the quality and interaction of the raw components. By skipping the baking process, we preserve the nuanced flavors of the raw honey and the structural integrity of the gluten-free oats. This recipe focuses on five distinct pillars of flavor and texture:
- The Hearty Base: We use thick-cut gluten-free rolled oats to ensure a substantial, satisfying “bite” that doesn’t turn mushy.
- The Velvety Binder: Creamy, drippy almond butter provides the “moist sheen” and healthy fats required to keep the bites together.
- The Cocoa Snap: Large dark chocolate chunks offer a stark, bittersweet contrast to the sweetness of the honey.
- The Amber Finish: A delicate drizzle of golden honey adds an immediate hit of sweetness and a beautiful visual gloss.
- The Mineral Edge: Flaky sea salt crystals (like Maldon) amplify the chocolate and nut flavors while providing a sharp, crystalline crunch.
The Essential Pantry Staples for Your Gluten-Free Snack Recipes
To achieve the exact visual and textural result seen in professional food photography, you must choose your ingredients with a forensic eye for detail. Not all almond butters or oats are created equal, and in a raw state recipe, there is nowhere for low-quality ingredients to hide.
Certified Gluten-Free Rolled Oats: Use 2 cups (180g) of oats. It is vital to ensure these are certified gluten-free to avoid cross-contamination, providing that thick, rustic texture seen in the macro photography. If you love using oats in your morning routine, you might also enjoy our chocolate almond oat waffles.
Creamy Almond Butter: You will need 1 cup (250g) of almond butter. Look for “natural” varieties where the only ingredients are almonds and salt; this ensures the “moist sheen” and a drippy consistency that incorporates easily into the dry oats.
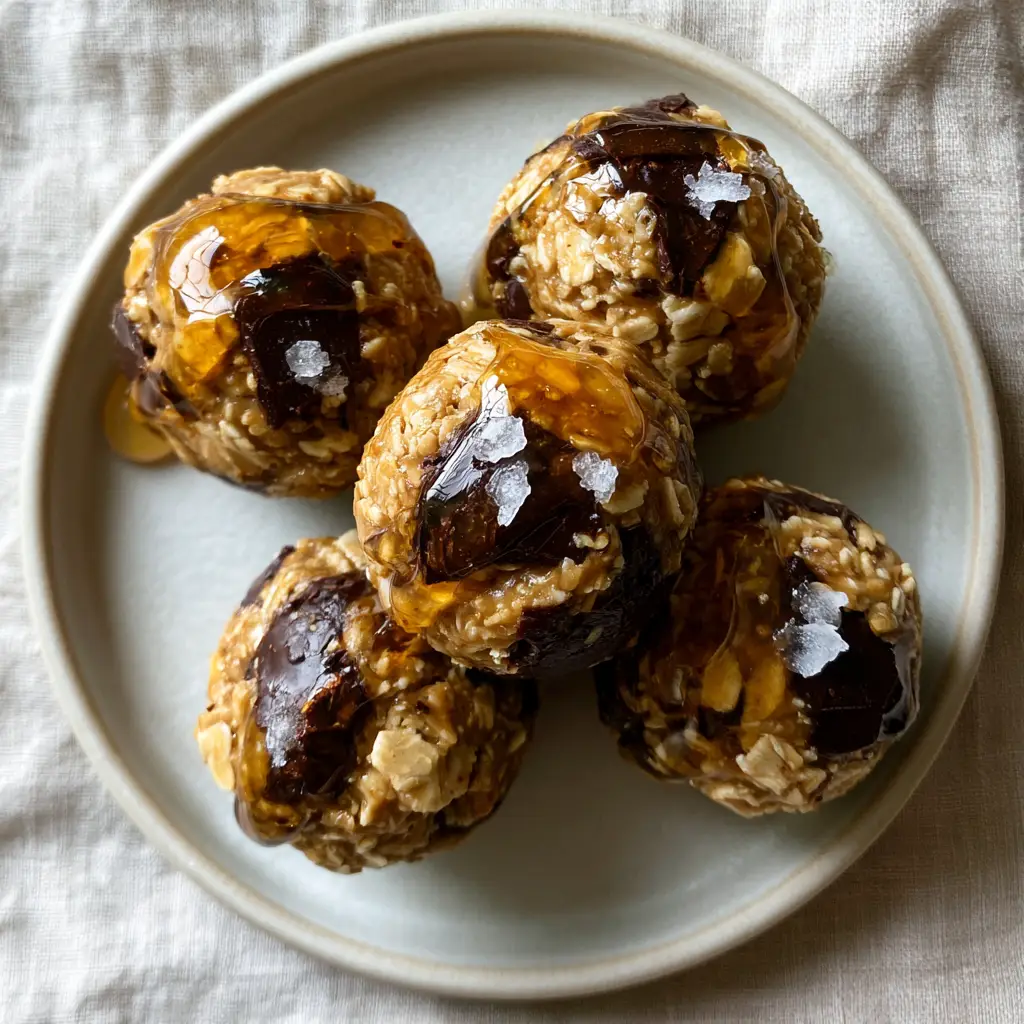
Dark Chocolate Chunks: Measure out 1/2 cup (85g) of large chunks. High cocoa content (70% or higher) is preferred to ensure the chunks remain glistening and bold against the light-colored oats.
Raw Golden Honey: Use 1/3 cup (113g) for the base and an extra 1 tbsp (21g) for the final drizzle. Honey acts as the primary adhesive while providing that amber glow that winds across the top of each bite.
Foundational Flavor Enhancers: Do not omit 1 tsp (5ml) of pure vanilla extract and 1/4 tsp (1.5g) of fine sea salt for the dough. These “invisible” ingredients are scientifically necessary to bridge the gap between the fat of the almond butter and the sugar of the honey.
The Final Garnish: 1 tsp (2g) of flaky sea salt crystals. These are the “distinct crystals” mentioned in the visual prompt that catch the light and provide a professional, high-end finish.
Specialty Equipment for Crafting Gourmet Snacks
While this is a no-bake recipe, using the right tools ensures consistent sizing and the “organic” yet professional look desired for high-end lifestyle food photography. You don’t need a kitchen full of gadgets, but a few specific items make a world of difference.
A medium-sized cookie scoop (about 1.5 tbsp capacity) is essential for creating five perfectly uniform spheres. This tool allows you to compress the mixture just enough to hold its shape while maintaining the visible texture of the oats on the surface.
A heavy-weighted glass mixing bowl helps when folding the thick almond butter into the oats, as the mixture becomes quite dense. For the final presentation, a matte off-white ceramic plate and a neutral, wrinkled linen napkin will recreate that soft, natural daylight aesthetic perfectly.
Mastering the Method: A Step-by-Step Culinary Guide
Phase 1: Hydrating the Oats and Emulsifying the Binder
In your large mixing bowl, combine the 1 cup (250g) of creamy almond butter, 1/3 cup (113g) of honey, and 1 tsp (5ml) of vanilla extract. Whisk these together vigorously until the mixture is completely smooth and appears glossy.
This emulsification is the secret to a moist bite; it ensures that every single oat flake is coated in a thin layer of fat and sugar. If your almond butter is too stiff, microwave it for 15 seconds to achieve a “drippy” state before mixing.
Phase 2: Incorporating the Textural Elements
Add the 2 cups (180g) of gluten-free rolled oats and the fine sea salt to the wet mixture. Use a sturdy spatula to fold the ingredients together until the oats are fully integrated and no dry pockets remain.
Fold in the 1/2 cup (85g) of dark chocolate chunks last. By adding them at the end, you prevent the chocolate from breaking down, ensuring those “large glistening chunks” remain intact and visible in the final product.
Phase 3: Shaping and Chilling for Structural Integrity
Using your cookie scoop, portion out the mixture and roll it between your palms to form round spheres. You should aim for roughly 1.5-inch (3.8cm) diameter balls to match the macro close-up aesthetic.
Place the bites on a parchment-lined tray and refrigerate for at least 30 minutes. This “chilled raw state” is crucial; it allows the oats to hydrate slightly and the almond butter to firm up, creating a snack that won’t fall apart when handled.
Phase 4: The Final Artistic Drizzle and Garnish
Once chilled, arrange five bites organically on your ceramic plate. Warm your remaining 1 tbsp (21g) of honey slightly so it flows easily from a spoon.
Move your hand in a slow, zig-zag motion to create a thin, delicate drizzle that winds across the tops of the bites. Immediately finish with exactly three or four crystals of flaky sea salt per bite, allowing them to stick to the fresh honey.
Expert Tips for Gluten-Free Snack Success
- The “Drippy” Test: If your almond butter is the bottom-of-the-jar dry variety, add 1 tsp (5ml) of melted coconut oil to restore the “moist sheen” described in the visual prompt.
- Oat Texture: Do not use quick oats or instant oats. They lack the surface area and “thick” visual appeal required for this specific texture; rolled oats are non-negotiable.
- Chocolate Placement: For the best photos, manually press a few extra chocolate chunks into the surface of the bites after rolling them to ensure they are “large and glistening.”
- Salt Timing: Only add the flaky salt right before serving. If added before chilling, the salt can dissolve into the honey, losing its distinct crystal shape.
Storage, Freshness, and Meal Prep Logistics
Because these gluten-free snack recipes rely on a “chilled raw state,” they should be stored in an airtight container in the refrigerator. They will remain fresh and maintain their structural integrity for up to 10 days.
For longer-term storage, these bites freeze exceptionally well. Place them in a single layer on a tray to freeze solid, then transfer to a freezer bag for up to 3 months. Simply thaw for 10 minutes at room temperature before eating to regain that perfect chew.
Creative Pairings for Your Gluten-Free Lifestyle
These energy bites are versatile enough to serve as a quick breakfast or a post-workout treat. To turn this into a full spread, consider serving them alongside a vibrant blackberry coconut pink drink for a refreshing contrast.
If you are looking for more “team-style” morning options, these bites fit perfectly into a larger menu of group breakfast ideas. Their portable nature also makes them a great companion to a decadent molten lava mug cake when you need a balanced dessert platter.
Frequently Asked Questions Regarding Gluten-Free Snacks
While oats are naturally gluten-free, they are often processed in facilities that handle wheat. Always look for ‘Certified Gluten-Free’ on the label to ensure they are safe for those with Celiac disease or gluten sensitivity.
Yes, you can substitute peanut butter or any other seed butter (like sunflower butter) at a 1:1 ratio. Ensure the consistency is creamy and ‘drippy’ for the best results.
Yes, maple syrup works well as a vegan alternative. However, honey is slightly thicker and acts as a better binder for the ‘chilled raw state’ texture.
If the mixture feels crumbly, add an extra tablespoon of almond butter or a teaspoon of melted coconut oil. The mixture should feel like slightly sticky cookie dough.
This usually happens if the oats aren’t hydrated enough or the chunks are too large. Try pressing the chunks firmly into the balls after rolling, or chop them into smaller fragments.
The Ultimate No-Bake Almond Butter & Chocolate Oat Bites
Gluten-free snack recipes: No-Bake Almond Butter and Dark Chocolate Oat Bites
Ingredients
Equipment
Method
- In a large bowl, whisk together the almond butter, 1/3 cup honey, and vanilla until a smooth, glossy emulsion forms.
- Fold in the gluten-free oats and fine sea salt using a sturdy spatula until every oat flake is coated in the almond butter mixture.
- Gently fold in the dark chocolate chunks, ensuring they are evenly distributed without breaking.
- Using a cookie scoop, portion the dough and roll between your palms into 1.5-inch spheres.
- Place bites on a parchment-lined tray and refrigerate for 30 minutes to set into a firm, chilled raw state.
- Drizzle the remaining honey over the bites and sprinkle with flaky sea salt crystals before serving.
Notes
Ensure oats are certified gluten-free to avoid contamination.
Closing & Call to Action
Mastering gluten-free snack recipes is all about balancing nutrition with an uncompromising approach to flavor and aesthetics. These almond butter and chocolate oat bites prove that healthy eating can look—and taste—absolutely indulgent. Whether you are prepping for a busy week or looking for a clean-label treat for the family, these bites are sure to become a permanent fixture in your kitchen.
If you enjoyed this recipe, please leave a comment below and let us know how your bites turned out! Don’t forget to save this recipe to your favorite boards on Pinterest so you always have it on hand.