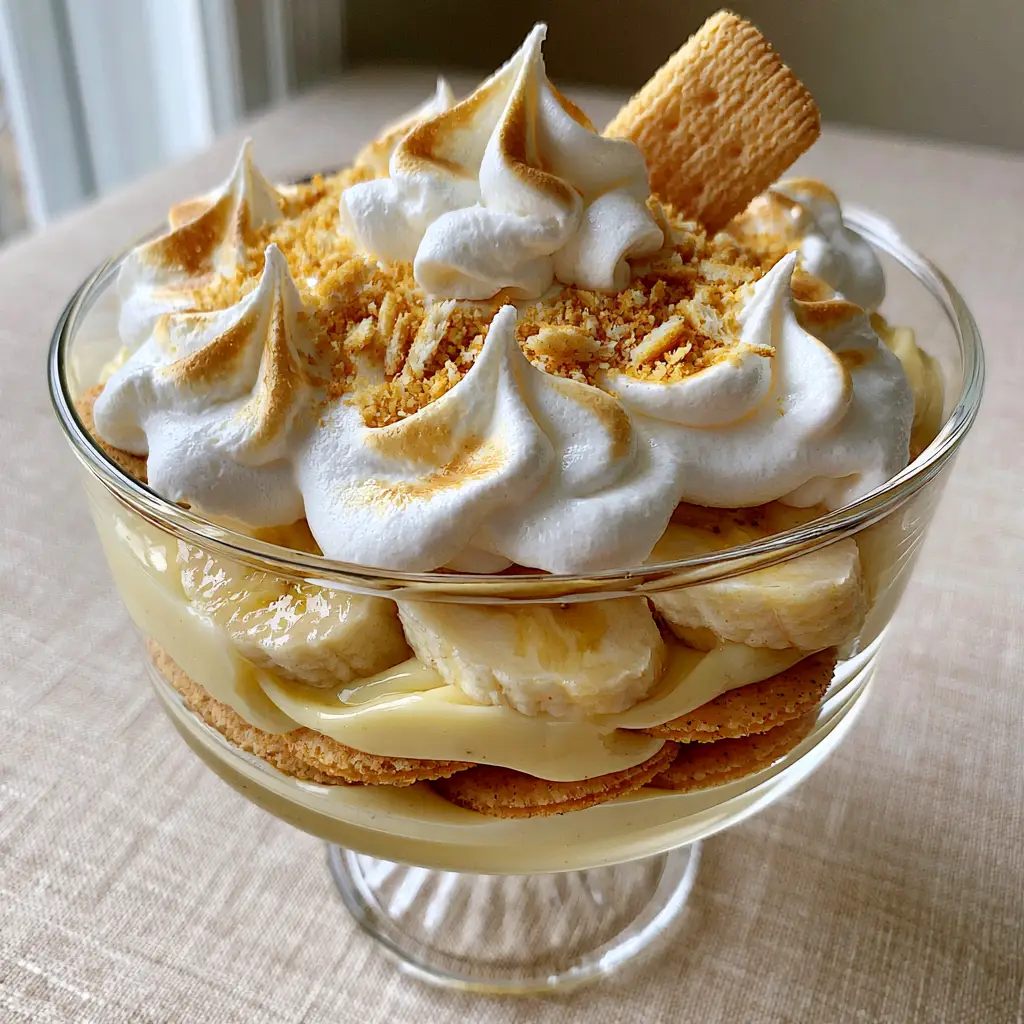
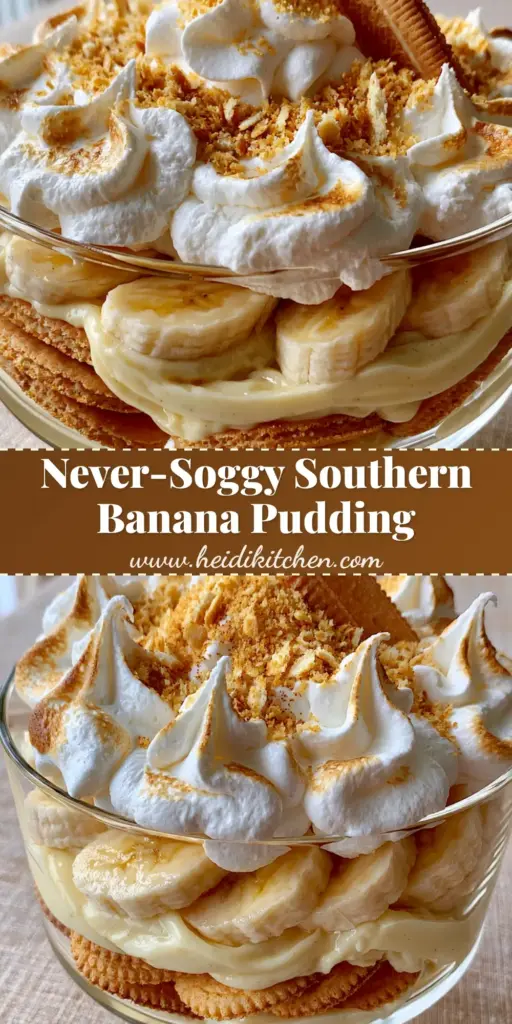
There is nothing quite like a classic, homemade banana pudding to anchor a Sunday dinner or a summer potluck. This isn’t just a dessert; it is a structural masterpiece of textures and nostalgic flavors. When you look through the clear walls of an elegant glass trifle dish, you should see a pristine architecture of golden-brown wafers, ivory banana slices, and a thick, pale-yellow custard that promises a velvety mouthfeel in every spoonful.
The secret to a truly show-stopping homemade banana pudding lies in the intersection of temperature and timing. By using a combination of traditional tempered egg yolks and modern sweetened condensed milk, we achieve a custard that is rich enough to hold its shape while remaining incredibly smooth. We are moving beyond the instant-mix versions of the past to create a dessert that features toasted golden meringue peaks and cloud-like dollops of fresh whipped cream.
Whether you are a seasoned baker or a home cook looking to impress, this recipe focuses on the sensory details that elevate a simple pudding into a gourmet experience. From the audible crunch of a fresh vanilla wafer to the visual appeal of perfectly toasted meringue, every element is designed for maximum impact.
Why This Layered Southern Classic Stands Above the Rest
- Structural Integrity: The thick, velvety custard is engineered to support the weight of multiple layers without turning the vanilla wafers into mush prematurely.
- Multi-Dimensional Topping: We combine the airy lightness of whipped cream with the stable, caramelized beauty of toasted meringue peaks for a stunning visual contrast.
- Clean-Cut Aesthetics: Designed specifically for clear glassware, the layering technique ensures distinct, sharp lines between the pale-yellow custard and the golden-brown biscuits.
- Natural Flavor Profile: By utilizing fresh, ripe bananas and real vanilla bean or extract, the flavor is authentically fruit-forward rather than artificial.
The Foundation: Essential Ingredients for the Perfect Custard
Sweetened Condensed Milk (14 oz / 397g): This is the backbone of our “Southern Style” richness. It provides a dense, silky texture and a deep milky sweetness that granulated sugar alone cannot replicate.
Whole Milk (3 cups / 720ml): We use full-fat dairy to ensure the custard has enough fat content to carry the delicate flavors of vanilla and banana throughout the dish.
Large Egg Yolks (4 units): These provide the essential emulsifiers. Yolks are responsible for that signature “pale-yellow” hue and the luxurious, tongue-coating feel of a professional pastry cream.
Cornstarch (1/3 cup / 40g): This is our thickening agent. It provides the structural “lift” needed to keep the layers distinct when sliced or scooped from the trifle dish.
Unsalted Butter (2 tbsp / 28g): Whisked in at the very end, butter adds a glossy sheen to the custard and rounds out the sharp sweetness of the condensed milk.
Vanilla Wafers (11 oz / 312g box): These act as the “cake” of the pudding. We use them whole for the layers and crushed into fine crumbs for the final artistic dusting.
Ripe Bananas (5 to 6 medium): Look for bananas that are yellow with just a few brown freckles. They should be sweet and aromatic but firm enough to hold their shape when sliced thin.
Heavy Whipping Cream (1 cup / 240ml): This must be kept ice-cold. It will be whipped into soft peaks to provide the “cloud-like” dollops that sit beneath our toasted meringue.
Necessary Tools for Trifle Architecture
To achieve the look of a pristine homemade banana pudding, you will need a 3-quart (2.8L) clear glass trifle dish. The transparency is vital for showcasing the layers. You will also need a heavy-bottomed saucepan to prevent the milk from scorching, a fine-mesh sieve to ensure the custard is perfectly lump-free, and a kitchen torch for those toasted meringue peaks.
If you enjoy crafting layered desserts, you might also find success with our decadent croissant bread pudding, which utilizes similar custard-soaking techniques. For those who prefer savory bakes, a high-quality whisk is also essential for creating the cheese sauce in our classic stuffed shells recipe.
Step-by-Step: Crafting the Velvety Banana Custard
1. Tempering the Egg Base
In a medium mixing bowl, whisk together your 4 egg yolks and 1/3 cup (40g) of cornstarch until the mixture is pale and completely smooth. In your heavy saucepan, combine the whole milk and sweetened condensed milk over medium heat. Bring the milk to a gentle simmer—look for small bubbles forming around the edges and wisps of steam rising from the surface.
2. Achieving the Thick Velvety Texture
Slowly ladle about 1/2 cup (120ml) of the hot milk mixture into the egg yolks while whisking constantly. This “tempering” process raises the temperature of the eggs slowly so they don’t scramble. Gradually pour the egg mixture back into the saucepan. Continue to cook over medium-low heat, whisking vigorously. You will feel the resistance increase as the starch activates. The custard is ready when it is thick enough to coat the back of a spoon and leaves a clear trail when you run your finger through it.
3. Finishing with Flavor
Remove the pan from the heat immediately. Stir in the 2 tbsp (28g) of butter and 2 tsp (10ml) of pure vanilla extract. For an ultra-professional finish, pour the custard through a fine-mesh sieve into a clean bowl. This removes any tiny bits of cooked egg, ensuring that “velvety” description is 100% accurate. Cover the surface directly with plastic wrap to prevent a skin from forming and let it cool to room temperature.
Precision Layering in the Trifle Dish
Building the Foundation
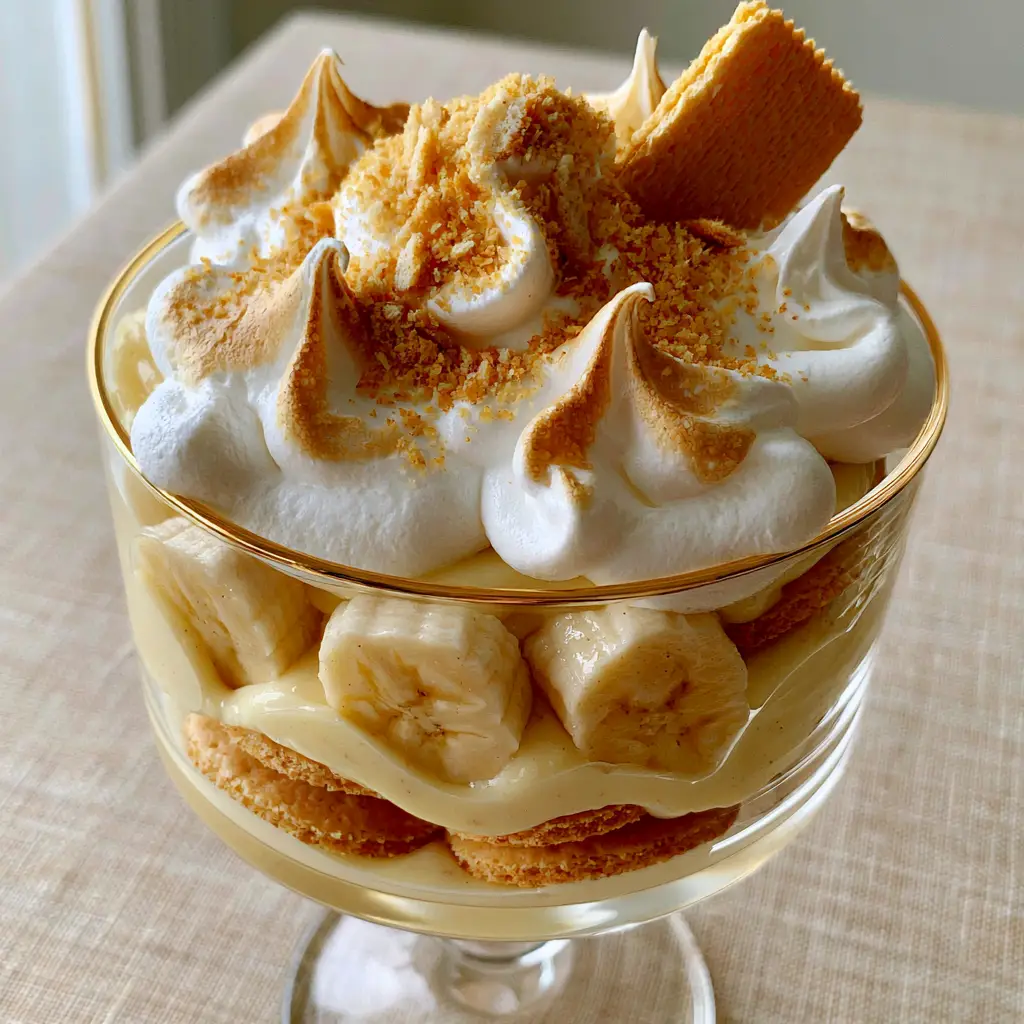
Start by placing a single layer of whole vanilla wafers at the bottom of your clear glass dish. Ensure they reach the very edges so they are visible from the side. Pour approximately one-quarter of your cooled custard over the wafers, using an offset spatula to smooth it into a level layer. This base layer will soften slightly, creating a texture reminiscent of the softest copycat subway cookies.
The Fruit and Wafer Sequence
Add a dense layer of fresh banana slices. Place them flat against the glass for a “clean-cut” look. Repeat the process: a layer of wafers, followed by a layer of custard, followed by a layer of bananas. You should aim for at least three full rotations of these layers to fill the dish. The final layer of custard should sit about an inch below the rim to leave room for the topping.
The Grand Finale: Meringue and Whipped Cream
Creating Soft Peaks
In a chilled bowl, whip your heavy cream with 2 tbsp (25g) of powdered sugar until soft peaks form. Dollop this generously over the top of the final custard layer. Use the back of a spoon to create “swooshes” and valleys in the cream, which will help catch the crumbs later.
Toasting the Meringue
For the toasted golden meringue peaks, whip 2 egg whites with 1/4 cup (50g) of sugar until stiff, glossy peaks form. Pipe or spoon small peaks of meringue on top of the whipped cream. Using a kitchen torch, gently pass the flame over the meringue peaks until they turn a delicate golden brown. This adds a sophisticated toasted marshmallow aroma to the homemade banana pudding.
The Final Artistic Flourish
Take your remaining 4-5 vanilla wafers and crush them into a fine dust. Sprinkle this dusting precisely over the top, focusing on the areas between the toasted peaks. Finally, take one pristine, whole vanilla wafer and tuck it at a 45-degree angle into the center for a classic professional garnish.
Expert Tips for Visual and Flavor Success
- Preventing Oxidation: To keep your banana slices from browning, toss them very lightly in a teaspoon of lemon juice before layering. The acid slows down the enzymatic browning without altering the flavor.
- The Overnight Rest: While it is tempting to eat immediately, this pudding needs at least 4 hours (ideally 8) in the refrigerator. This allows the wafers to absorb moisture from the custard, transforming them into a cake-like consistency.
- Temperature Control: Ensure your custard is cooled to room temperature before layering. If it is too hot, it will melt the whipped cream and cause the bananas to release too much moisture.
- Texture Contrast: If you love a bit of crunch, serve the pudding with a side of salty chocolate chip cookies to provide a firm texture against the soft pudding.
Frequently Asked Questions
While you can, a true homemade banana pudding relies on the thick, velvety texture of a cooked egg-yolk and condensed milk custard. Instant pudding lacks the structural integrity to hold the clean-cut layers seen in a trifle dish.
A kitchen torch is the easiest way to get those golden peaks without heating the pudding. If you don’t have one, you can briefly place the dish under a broiler, but watch it extremely closely to avoid melting the whipped cream.
To prevent oxidation, toss your banana slices lightly in a small amount of lemon or pineapple juice before layering. Additionally, ensuring the bananas are completely submerged in the custard helps block air exposure.
For the best results, chill for at least 4 to 8 hours. This time allows the vanilla wafers to absorb moisture from the custard, transforming them into a soft, cake-like texture.
Watery pudding is usually caused by ‘weeping’ bananas or custard that wasn’t cooked long enough to fully activate the cornstarch. Ensure the custard coats the back of a spoon thickly before cooling.
How to Store Your Banana Trifle
This dessert is best enjoyed within 24 to 48 hours. Because of the fresh bananas and the dairy-heavy custard, it must be kept refrigerated. Cover the top of the trifle dish tightly with plastic wrap or a fitted lid. Note that the meringue may begin to “weep” (release small sugar droplets) after 24 hours due to the humidity in the fridge, so it is best to torch the meringue shortly before serving if possible.
Do not freeze this recipe. The cornstarch-based custard will break down upon thawing, resulting in a watery, grainy texture that loses its velvety appeal.
Perfect Pairings for a Southern Feast
This homemade banana pudding serves as the perfect cooling finish to a spicy or savory meal. Consider serving it after a hearty bowl of Egyptian red lentil soup or a plate of Cajun chicken alfredo shells. The creaminess of the pudding balances the heat and acidity of these dishes beautifully.
The Best Homemade Banana Pudding Recipe
Homemade Banana Pudding: The Ultimate Southern Trifle with Velvety Custard
Ingredients
Equipment
Method
- In a bowl, whisk egg yolks and cornstarch until smooth.
- Heat whole milk and condensed milk in a saucepan until simmering.
- Slowly whisk hot milk into yolks, then return all to the pan. Whisk over medium heat until thick and velvety, coating the back of a spoon.
- Place wafers at the bottom of a trifle dish. Add a layer of custard, then a layer of sliced bananas.
- Repeat wafers, custard, and bananas until dish is nearly full, ending with a custard layer.
- Whip heavy cream and dollop over the pudding.
- Beat egg whites and sugar to stiff peaks. Pipe onto cream and toast with a kitchen torch until golden brown.
- Dust with crushed wafer crumbs and place one whole wafer at an angle for garnish.
Notes
Chill for at least 4 hours to allow the wafers to soften into a cake-like texture.
Closing & Call to Action
Mastering the homemade banana pudding is a rite of passage for any home cook who loves classic comfort food. With its velvety custard, crisp wafers, and toasted meringue, it hits every sensory note required for a perfect dessert. If you enjoyed this recipe, please leave a comment below and let us know how your layers turned out! Don’t forget to follow us and share your creations on Pinterest.