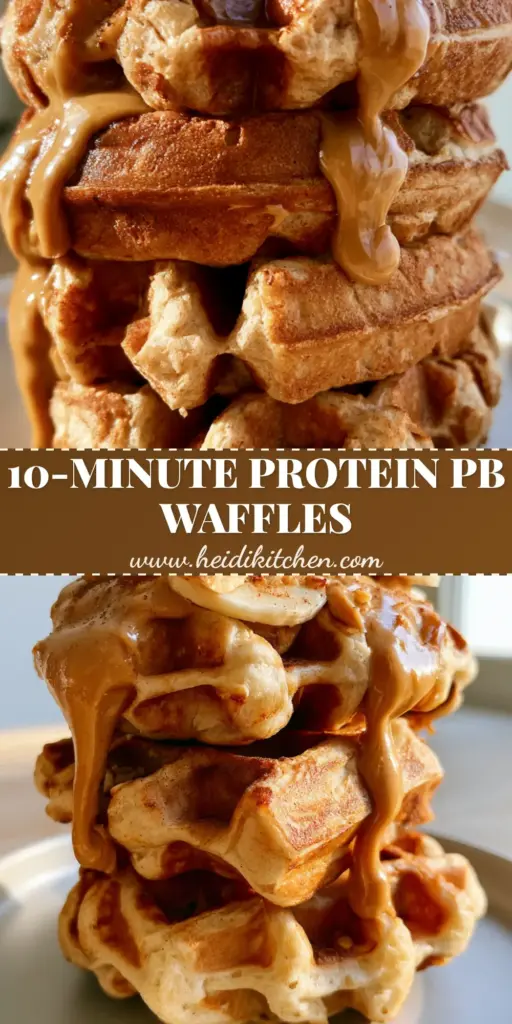
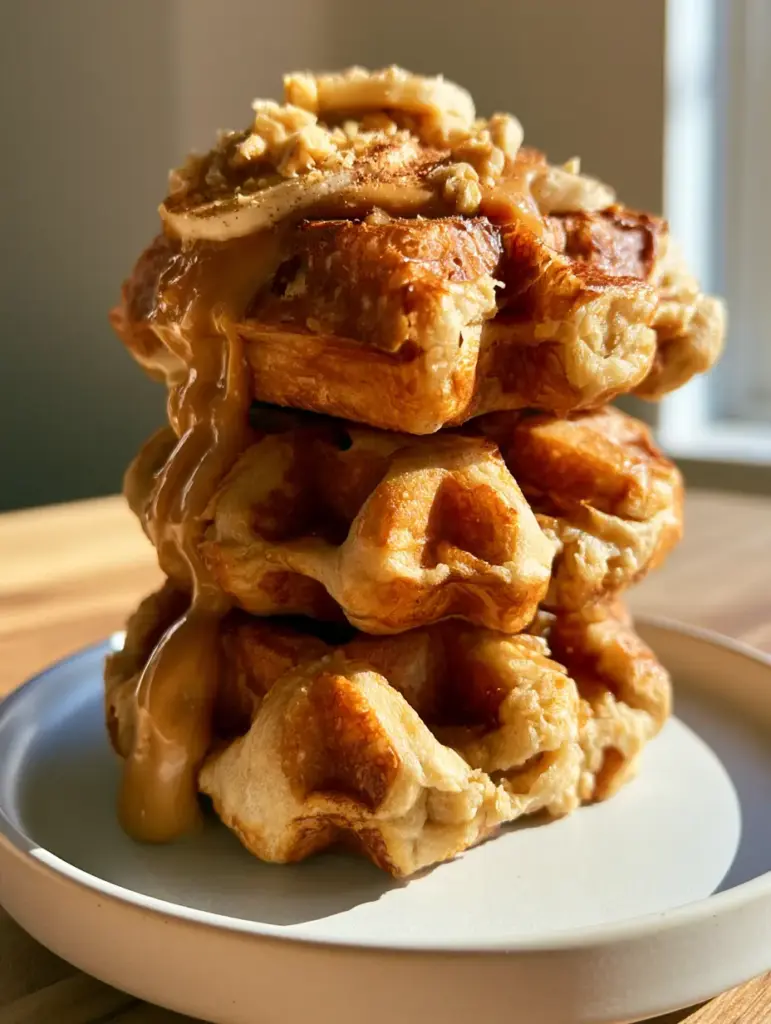
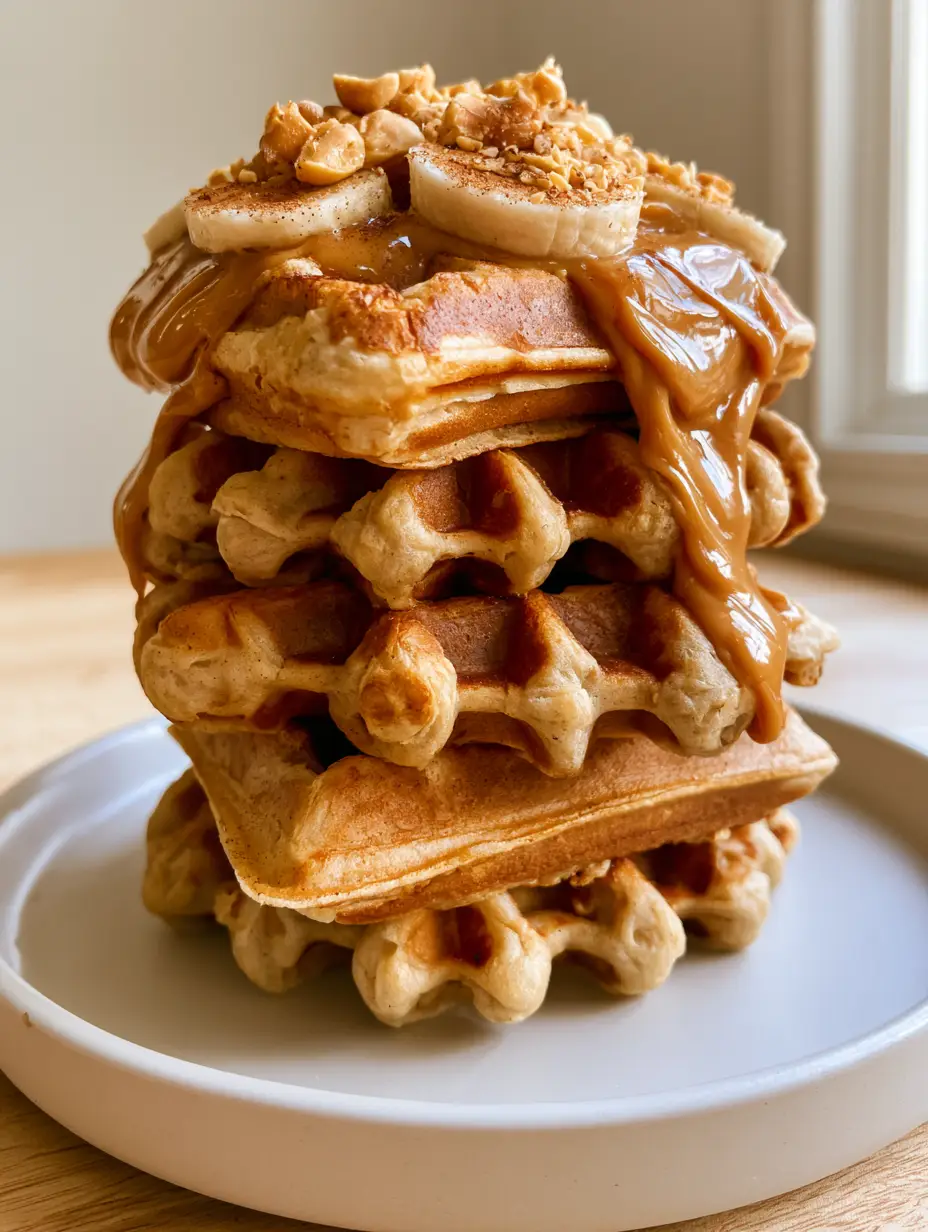
There is a specific kind of morning magic that only peanut butter waffles can conjure. Imagine standing in a sun-drenched kitchen, the “golden hour” light pouring through the window and hitting a stack of three thick, Belgian-style waffles. These aren’t just any waffles; they are architectural marvels with deep, crispy nooks designed specifically to trap a glistening river of warm, melted peanut butter.
The visual appeal of this dish is undeniable—the way the creamy peanut butter cascades down the golden-brown sides, settling into the crevices alongside fresh banana rounds and a delicate dusting of cinnamon. If you have been searching for a breakfast that feels like a gourmet café experience but can be mastered in your own kitchen, you have arrived. This recipe balances the salty-sweet richness of roasted peanuts with an incredibly light and airy interior that practically melts in your mouth.
Whether you are a long-time fan of classic fluffy waffles or you are looking to elevate your weekend brunch game, this peanut butter-infused version is the gold standard. Every bite offers a textural symphony: the initial crunch of the exterior, the soft crumb of the middle, and the occasional snap of crushed roasted peanuts. Let’s dive into the culinary science behind creating this masterpiece.
Unlocking the Science of the Perfect Belgian Crunch
- Textural Contrast: We utilize a specific ratio of fats and leavening agents to ensure a shatteringly crisp exterior while maintaining a cloud-like center.
- Deep Nook Architecture: By using a Belgian iron, we create high-surface-area “wells” that hold the melted peanut butter drizzle perfectly, as seen in our visual blueprint.
- Aromatic Warmth: The addition of ground cinnamon and vanilla extract bridges the gap between the savory peanut notes and the sweet banana toppings.
- Protein-Packed Satiety: Unlike standard waffles, the inclusion of peanut butter in the batter provides a more filling, nutrient-dense start to your day.
The Anatomy of a Nutty Batter: Premium Ingredients Only
All-Purpose Flour (2 cups / 250g): This provides the structural foundation for our waffles. The moderate protein content allows for enough gluten development to hold the “lift” without becoming chewy or tough.
Cornstarch (1/4 cup / 32g): My secret weapon for ultimate crispiness. Cornstarch softens the flour’s proteins, resulting in a more tender crumb and a dryer, crunchier exterior shell that resists getting soggy under the peanut butter river.
Baking Powder (1 tbsp / 12g): Essential for that “airy interior” described in the Midjourney prompt. It reacts with the heat to create carbon dioxide bubbles, pushing the batter into every corner of the iron.
Granulated Sugar (2 tbsp / 25g): While the peanut butter provides a savory note, sugar is necessary for the Maillard reaction. This is what gives us that beautiful golden-brown color and a subtle caramelized flavor.
Buttermilk (1 3/4 cups / 420ml): The acidity in buttermilk breaks down gluten strands for a more delicate texture. If you prefer a dairy-free approach, you can explore our paleo and dairy-free options for similar results.
Creamy Peanut Butter (1/2 cup / 125g): We use a high-quality creamy peanut butter inside the batter for a consistent flavor profile and a separate portion melted for the signature drizzle.
Melted Butter (1/3 cup / 75g): Butter provides the fat necessary for a rich mouthfeel. We also include a “melting butter pat” on top of the final stack to enhance the visual and sensory indulgence.
Large Eggs (2): We separate the whites and yolks to achieve maximum aeration. The yolks provide richness, while the whipped whites create the “soft, airy interior” that defines a true Belgian waffle.
Fresh Bananas (2): Thinly sliced rounds are the primary topping, providing a cool, creamy contrast to the warm, toasted waffles.
Crushed Roasted Peanuts (2 tbsp / 20g): These add “high texture detail” and reinforce the peanut flavor throughout the dish.
The Toolkit: Must-Have Gear for Deep Belgian Nooks
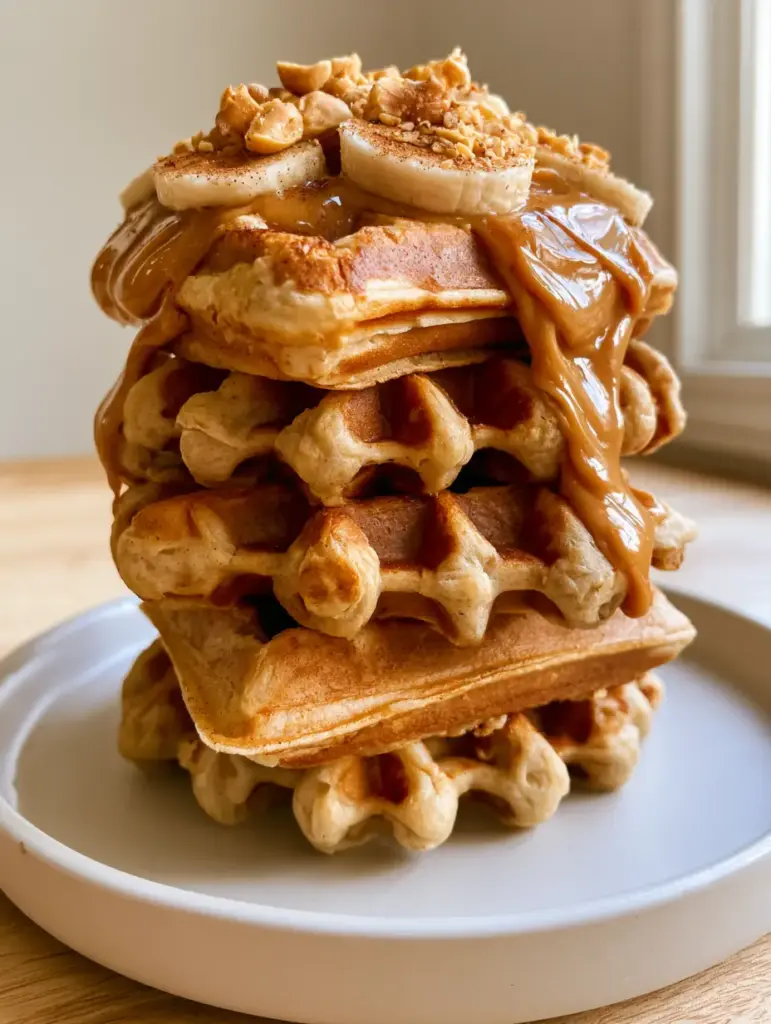
To achieve the specific look of a “vertical stack of three thick, golden-brown Belgian waffles,” you need a Belgian Waffle Maker with deep grids. Standard waffle irons are too shallow and won’t produce the “nooks” required to hold the peanut butter cascade. You will also need a fine-mesh sieve for the cinnamon dusting and a balloon whisk to incorporate air into the batter.
I also recommend using a matte white ceramic plate for serving. As noted in our visual prompt, the minimalist background allows the warm highlights of the peanut butter and the textures of the roasted peanuts to truly pop, making the dish look “extremely appetizing” for your morning photography.
Mastering the Pour: A Guide to Waffle Iron Excellence
Step 1: Preparing the Nutty Dry Base
In a large mixing bowl, sift together the flour, cornstarch, baking powder, and salt. Sifting is a non-negotiable step here; it removes clumps and ensures the cornstarch is perfectly distributed for that maximum crunch. Add the sugar and whisk briefly to combine. Creating a well in the center will help you integrate the wet ingredients without overworking the gluten.
Step 2: Emulsifying the Peanut Butter and Wet Ingredients
In a separate microwave-safe bowl, gently warm the peanut butter and butter together until they are liquid and easy to stir. Whisk in the buttermilk, egg yolks, and vanilla extract. The mixture should be a smooth, pale tan color. If you’re a fan of this flavor profile, you might also enjoy our protein peanut butter cheesecake cups as a post-breakfast treat.
Step 3: The Secret to the Airy Interior
Using a clean bowl and a whisk (or hand mixer), beat the egg whites until stiff peaks form. This is the professional secret to achieving that “soft, airy interior.” Gently fold the egg whites into the main batter using a silicone spatula. Stop as soon as no large white streaks remain; a few small lumps are perfectly fine and actually help the texture.
Step 4: Achieving the Golden-Brown Sear
Preheat your Belgian waffle iron to its highest setting. Brush the plates lightly with oil, even if they are non-stick. Pour about 1/2 to 3/4 cup of batter into the center and close the lid. Listen for the steam to subside; this is the sensory cue that the waffles are reaching peak crispiness. Look for a deep golden-brown color before removing.
Step 5: The Visual Art of the Garnish
Stack three waffles vertically on your matte white plate. Place a pat of butter on the top waffle, allowing it to begin melting into the nooks. Arrange the thin banana rounds across the surface. Warm a few tablespoons of creamy peanut butter in the microwave for 15 seconds, then pour it over the stack, ensuring it “cascades down the sides” just like the visual blueprint. Finish with a sprinkle of crushed peanuts and a “tiny dusting of cinnamon.”
Pro Secrets for the Softest, Airiest Interior
- Don’t Overmix: The more you stir the batter after adding the liquid, the tougher the waffle becomes. Fold gently!
- Temperature Control: Ensure your buttermilk and eggs are at room temperature to prevent the melted butter from seizing up in the batter.
- Rest the Batter: Let the batter sit for 5-10 minutes before cooking. This allows the flour to fully hydrate and the gluten to relax.
- The Wire Rack Trick: Never stack hot waffles directly on top of each other until you are ready to serve. Place them on a wire cooling rack so air can circulate, preventing the bottom from becoming soggy.
Preserving the Crisp: How to Store and Reheat
If you have leftover peanut butter waffles, they freeze beautifully. Allow them to cool completely on a wire rack to prevent ice crystal formation. Place them in a single layer in a freezer-safe bag with parchment paper between them. They will stay fresh for up to 3 months.
To reheat, avoid the microwave at all costs! To restore the “deep, crispy nooks,” place the frozen waffles directly into a toaster or a 350°F (175°C) oven for 5-8 minutes. This dry heat revitalizes the exterior crunch while keeping the middle soft.
Elevate the Plate: Pairing Suggestions and Toppings
While these waffles are a meal on their own, they pair beautifully with a side of crispy bacon or a protein-rich yogurt parfait. If you are looking for a more savory morning, you might try our avocado toast ideas as a side. For those who love variety in their waffle routine, consider alternating these with our beet and banana waffles for a colorful, nutrient-dense twist.
For a full brunch spread, these waffles sit perfectly alongside other classics like perfect homemade pancakes, giving your guests a choice between nutty, crispy waffles and soft, buttery flapjacks.
Frequently Asked Questions
You can mix the dry and wet ingredients separately, but do not combine them or fold in the egg whites until you are ready to cook, or you will lose the airy lift.
Yes, but ensure it is well-stirred so the oil is fully incorporated. Natural PB can be slightly grittier, which adds to the rustic texture of the waffles.
The secret is adding cornstarch to the flour and ensuring your waffle iron is fully preheated. Also, never stack hot waffles directly on a plate; use a wire rack first.
Place it in a microwave-safe bowl for 15-20 seconds. Adding a teaspoon of coconut oil can help create a smoother, more ‘pourable’ consistency.
This usually happens if the batter is too thin or if the waffles aren’t cooked long enough. Wait for the steam to stop coming out of the iron before checking them.
The Ultimate Peanut Butter Belgian Waffle Recipe
Peanut Butter Waffles: The Ultimate Crispy Belgian Breakfast Guide
Ingredients
Equipment
Method
- In a large bowl, sift together flour, cornstarch, baking powder, and salt. Whisk in sugar.
- Whisk buttermilk, melted peanut butter, melted butter, egg yolks, and vanilla until smooth.
- Beat egg whites to stiff peaks, then gently fold into the main batter until just combined.
- Pour batter into a preheated Belgian waffle iron and cook until deep golden-brown and crispy.
- Stack waffles, top with banana slices, melted peanut butter drizzle, crushed peanuts, and a dusting of cinnamon.
Notes
Fold the egg whites gently to maintain the airy interior texture.
Closing & Call to Action
These peanut butter waffles are more than just a breakfast; they are a sensory experience designed to make your mornings feel special. From the glistening peanut butter drizzle to the “high texture detail” of the roasted nuts, every element is crafted for maximum enjoyment. If you loved this recipe, please leave a comment below and let me know how your “golden hour” breakfast turned out!
Don’t forget to save this recipe to your breakfast board on Pinterest so you can find it every weekend. Happy cooking!