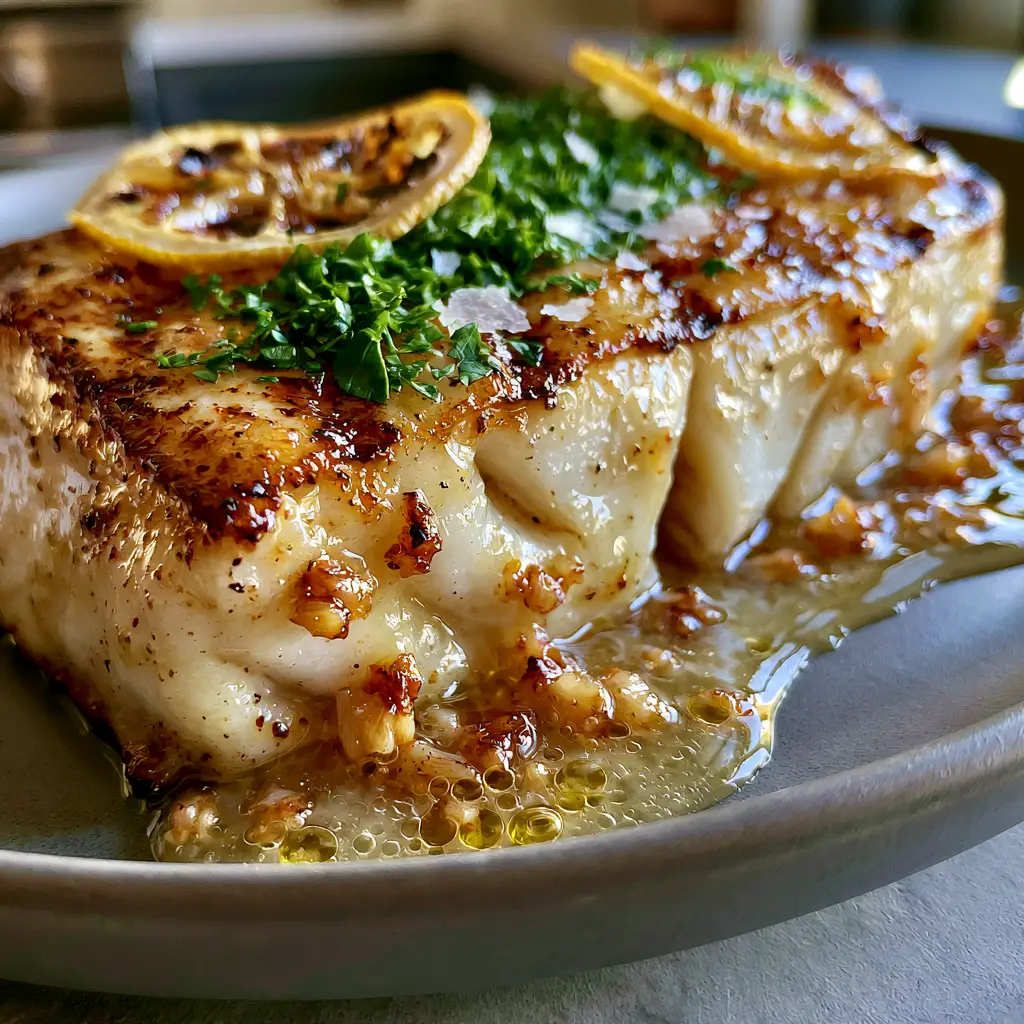
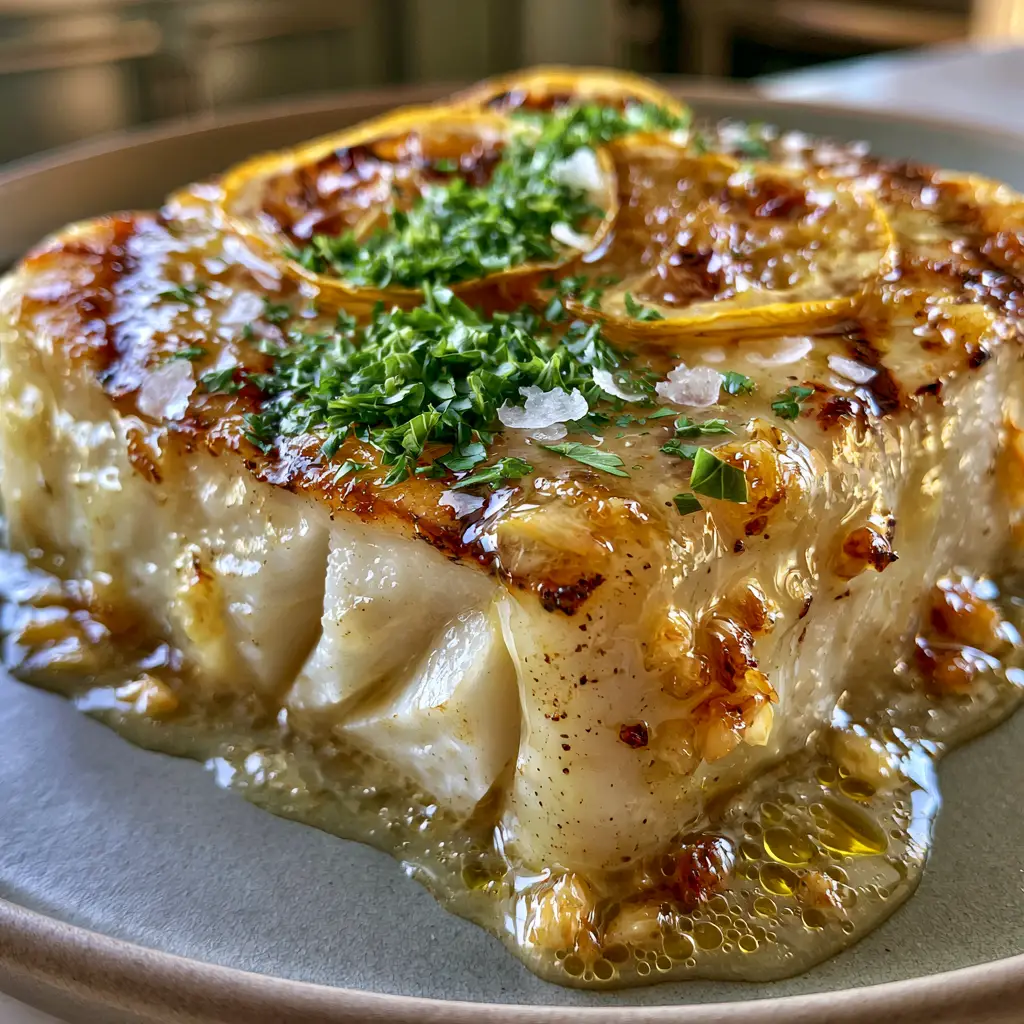
There is nothing quite like the sight of a thick, juicy grilled halibut steak arriving at the table, its surface etched with dark brown grill marks that promise a smoky, caramelized depth. This grilled halibut recipe is designed to help you achieve that restaurant-quality finish right in your own backyard, focusing on the delicate balance between high-heat searing and maintaining a moist, opaque center. When you pull this fish off the grates, the large flakes should just begin to separate under the slightest pressure, signaling the peak of tenderness.
To elevate this dish from a simple meal to a culinary event, we drape the fillets in a thick, translucent lemon garlic butter sauce that glistens under natural light. Every bite is punctuated by the crunch of coarse sea salt flakes and the bright, herbal aroma of freshly chopped parsley. Whether you are a seasoned griller or a kitchen novice, this guide provides the forensic culinary details needed to master the art of the perfect white fish sear.
Why This Grilled Halibut Recipe Redefines Seafood Excellence
- The Perfect Flake: We target an internal temperature that ensures the fish remains juicy and opaque, preventing the dreaded rubbery texture of overcooked halibut.
- Visual Contrast: The combination of dark, caramelized grill marks against the pristine white flesh creates a professional aesthetic that rivals high-end bistros.
- Layered Aromatics: By sautéing minced garlic bits directly into the butter, we create a sauce that offers both sweetness and a savory bite.
- Charred Citrus Depth: Grilling paper-thin lemon wheels alongside the fish concentrates their sugars, providing a smoky acidity that cuts through the rich butter glaze.
The Anatomy of Ingredients for Gourmet Grilled Halibut
Thick Halibut Fillets or Steaks: Aim for pieces at least 1.5 inches (3.8cm) thick to ensure the interior remains moist while the exterior develops a crust. Halibut is a lean protein, so its structure relies on precise timing to maintain those beautiful, distinct flakes.
Unsalted Butter: Using 4 tbsp (56g) of high-quality butter allows you to control the sodium levels while creating a luxurious, translucent glaze. Butter is the vehicle for the garlic and lemon, binding the flavors to the fish’s surface.
Fresh Garlic: 3 cloves (15g), finely minced, provide the “sautéed bits” mentioned in our visual blueprint. Sautéing them gently prevents bitterness while infusing the fat with a nutty, pungent aroma.
Lemon Juice and Zest: The acidity of 2 tbsp (30ml) of juice acts as a chemical tenderizer and flavor brightener, cutting through the fattiness of the fish and butter. The charred lemon wheels add a visually stunning, smoky element to the final presentation.
Fresh Flat-Leaf Parsley: A generous dusting of bright green chopped parsley adds an earthy finish and a pop of color that contrasts beautifully against the matte grey ceramic plate. If you enjoy fresh herbs, you might also find inspiration in our savory chicken and broccoli pairings.
Maldon Sea Salt Flakes and Cracked Black Pepper: These aren’t just seasonings; they are textural elements. The coarse flakes of salt provide a sudden burst of salinity that enhances the natural sweetness of the halibut.
High-Heat Cooking Oil: 2 tbsp (30ml) of avocado or grapeseed oil is essential for the grill. A high smoke point prevents the oil from breaking down and sticking to the grates, ensuring those dark brown marks remain intact.
Essential Equipment for a Flawless Sear
To achieve the results seen in high-end food photography, you need the right tools. A cast-iron grill grate or a heavy-duty outdoor grill is preferred for heat retention. A long-handled fish spatula is non-negotiable; its thin, flexible edge allows you to slide under the delicate fillets without breaking the flakes.
An instant-read meat thermometer is your best friend here. Because halibut transitions from “perfectly opaque” to “dry” within a matter of two minutes, monitoring the internal temperature is the only way to guarantee success. Finally, a small stainless steel saucepan is needed to emulsify the lemon garlic butter sauce until it reaches that thick, micro-bubbled consistency.
Step-by-Step Mastery: How to Grill the Perfect Halibut
Preparation and Moisture Control
Remove your halibut from the refrigerator 20 minutes before cooking to take the chill off. Use a paper towel to pat the fish extremely dry on all sides; any surface moisture will create steam, preventing the formation of those dark brown grill marks. Season generously with cracked black pepper and a light dusting of fine salt, saving the Maldon flakes for the final garnish.
Achieving the Iconic Sear
Preheat your grill to medium-high heat, approximately 400°F (204°C). Clean the grates thoroughly and oil them using a rolled-up paper towel dipped in high-smoke-point oil. Place the halibut on the grates and leave it undisturbed for 4-5 minutes. You are looking for the “release” cue—the fish will naturally let go of the grate once a caramelized crust has formed.
The Art of the Charred Lemon
While the fish sears, place your paper-thin lemon wheels directly onto the cooler side of the grill. Flip them after 2 minutes or until they show distinct blackened edges and the flesh has become translucent. These will serve as a concentrated flavor bomb and a professional-grade garnish for your matte ceramic plating.
Crafting the Thick Lemon Garlic Butter Sauce
In a small saucepan over medium heat, melt the butter until it begins to foam. Add the minced garlic and sauté for 60 seconds until fragrant and just starting to turn golden. Whisk in the lemon juice and a pinch of parsley, stirring constantly to create a thick, translucent emulsion. Look for the micro-bubbles of oil—this indicates the sauce is properly bound and ready to drape over the fish.
The Final Temperature Check
Carefully flip the halibut using your fish spatula. The second side will cook faster, usually requiring only 3-4 minutes. Aim for an internal temperature of 130°F (54°C) for a perfect medium. The fish should be an opaque white, with the flakes just starting to separate, indicating it is juicy and tender. Rest the fish for 2 minutes before saucing to allow the juices to redistribute.
Expert Tips for Culinary Success
- The 70/30 Rule: Do 70% of the cooking on the first side. This ensures a deep, dark brown grill mark while the second side gently finishes the interior to avoid drying it out.
- Oil the Fish, Not Just the Grill: For an extra insurance policy against sticking, lightly brush the halibut fillets with oil in addition to oiling the grates.
- Don’t Over-Mince the Garlic: You want “minced bits,” not a paste. The visible pieces of sautéed garlic provide a rustic, authentic look to the sauce, as seen in our visual blueprint.
- Choose Your Plate Wisely: A matte grey ceramic plate provides a neutral backdrop that makes the white fish and bright green parsley visually pop.
What to Serve with Grilled Halibut
This grilled halibut recipe is the star of the show, but it pairs beautifully with light, vibrant sides. Consider serving it alongside a refreshing avocado-based salad or a portion of creamy pasta with asparagus. The acidity of the lemon butter sauce also complements the richness of other buttery white fish if you are hosting a multi-course seafood dinner.
For those following specific dietary paths, this recipe is naturally gluten-free and can be easily adapted for paleo dairy-free lifestyles by substituting the butter for a high-quality ghee or a splash of olive oil and extra garlic.
Storage, Reheating, and Freshness
Fresh halibut is always best, but if you have leftovers, store them in an airtight container in the refrigerator for up to two days. To reheat, avoid the microwave, which will turn the delicate flakes rubbery. Instead, place the fish in a lidded skillet with a splash of water or extra butter over low heat until just warmed through.
Freezing cooked halibut is not recommended as it destroys the delicate cellular structure of the flakes. If you must freeze raw halibut, vacuum seal it to prevent freezer burn and thaw it slowly in the refrigerator overnight before grilling.
Frequently Asked Questions
Yes, but ensure it is fully thawed in the refrigerator and patted extremely dry. Frozen fish often holds more moisture, which can hinder the formation of dark grill marks.
Whisk the lemon juice into the melted butter and garlic over medium heat. The agitation helps emulsify the fat and acid into a translucent, thick glaze.
Ensure your grates are scrubbed clean and well-oiled. Most importantly, pat the halibut fillets completely dry and don’t try to flip them until they naturally release from the heat.
For juicy, opaque flakes, pull the halibut off the grill at 130°F (54°C). The temperature will rise slightly during resting to a perfect 135°F (57°C).
This is a sign of overcooking. Halibut is lean and dries out quickly; use a thermometer to ensure you don’t exceed an internal temperature of 135°F.
The Ultimate Grilled Halibut with Lemon Garlic Butter
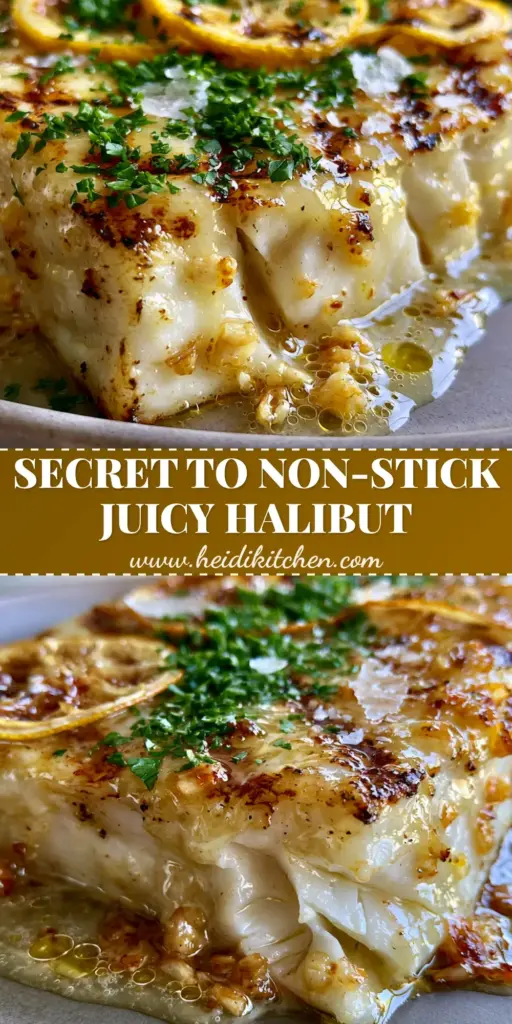
Grilled Halibut Recipe with Thick Lemon Garlic Butter and Charred Lemon
Ingredients
Equipment
Method
- Pat the halibut fillets extremely dry with paper towels to ensure a good sear. Let sit at room temp for 20 minutes.
- Season all sides with cracked black pepper and a light dusting of fine salt.
- Place fish on a preheated 400°F (204°C) oiled grill. Sear for 4-5 minutes until dark brown grill marks form and fish releases easily.
- Place lemon wheels on the grill grates for 2 minutes per side until charred and blackened at the edges.
- Flip the halibut and cook for another 3-4 minutes until the center is opaque and reaches an internal temperature of 130°F (54°C).
- Sauté minced garlic in melted butter for 1 minute. Whisk in lemon juice until a thick, bubbly emulsion forms.
- Place halibut on a matte ceramic plate. Drape with butter sauce, add charred lemons, parsley, and Maldon sea salt flakes.
Notes
Use a fish spatula to avoid breaking the delicate flakes during the flip.
Closing & Call to Action
Mastering this grilled halibut recipe is a rite of passage for any home cook looking to bring professional seafood techniques into their kitchen. The contrast of the smoky, charred exterior with the succulent, buttery interior creates a sensory experience that is truly unmatched. If you enjoyed this recipe, please leave a comment below and share your results! Don’t forget to pin this to your favorite boards on Pinterest so you can find it the next time you have a fresh catch ready for the grill.